Ánh xạ và Stacksets
Ánh xạ
Phần ánh xạ trong CloudFormation template có ý nghĩa trong việc gán một key với một tập các giá trị tương ứng. Ví dụ: nếu bạn muốn thiết lập các giá trị dựa theo region, bạn có thể tạo ánh xạ giữa region đóng vai trò là key với các giá trị chỉ định nằm trong region mà template được triển khai. Điều này có thể đặc biệt hữu ích khi triển khai các gói cài đặt AMI cho global, đó là trường hợp mà ID của các AMI là khác nhau giữa các khu vực.
StackSets
AWS CloudFormation StackSets giúp mở rộng chức năng của Stack bằng cách cho phép bạn tạo, cập nhật hoặc xóa Stack nằm trên trên nhiều Account hoặc trên nhiều Region chỉ với một thao tác duy nhất.
Sử dụng User có quyền quản trị, bạn có thể định nghĩa và quản lý một AWS CloudFormation template, đồng thời sử dụng template này làm cơ sở để triển khai Stack lên các Account và Region mà ta mong muốn.
Ví dụ: bạn có thể dễ dàng thiết lập chính sách AWS CloudTrail hoặc AWS Config trên nhiều Account chỉ bằng một thao tác với StackSet. Bạn cũng có thể sử dụng StackSets để triển khai tài nguyên cho một Account nhưng nằm trên nhiều Region.
Ở phần này, chúng ta sẽ triển khai một CloudFormation template đơn giản giúp tạo ta EC2 Instance chạy web server. Chúng ta sẽ sử dụng ánh xạ để triển khai chính xác Amazon Linux 2 AMI cho Region đã chọn, trong khi sử dụng StackSets để cấu hình Region nào sẽ triển khai template này. Để cho đơn giản, chúng ta sẽ sử dụng User có quyền quản trị tuyệt đối để thực thi, tuy nhiên thực tế bạn có thể sử dụng tài khoản khác giới hạn về quyền hơn để triển khai StackSets.
Chi tiết bạn có thể truy cập trang Prerequisites: Granting Permissions for Stack Set Operations để biết thêm thông tin về cách cấu hình đúng hai Role cần thiết cho việc triển khai StackSets trên nhiều Account.
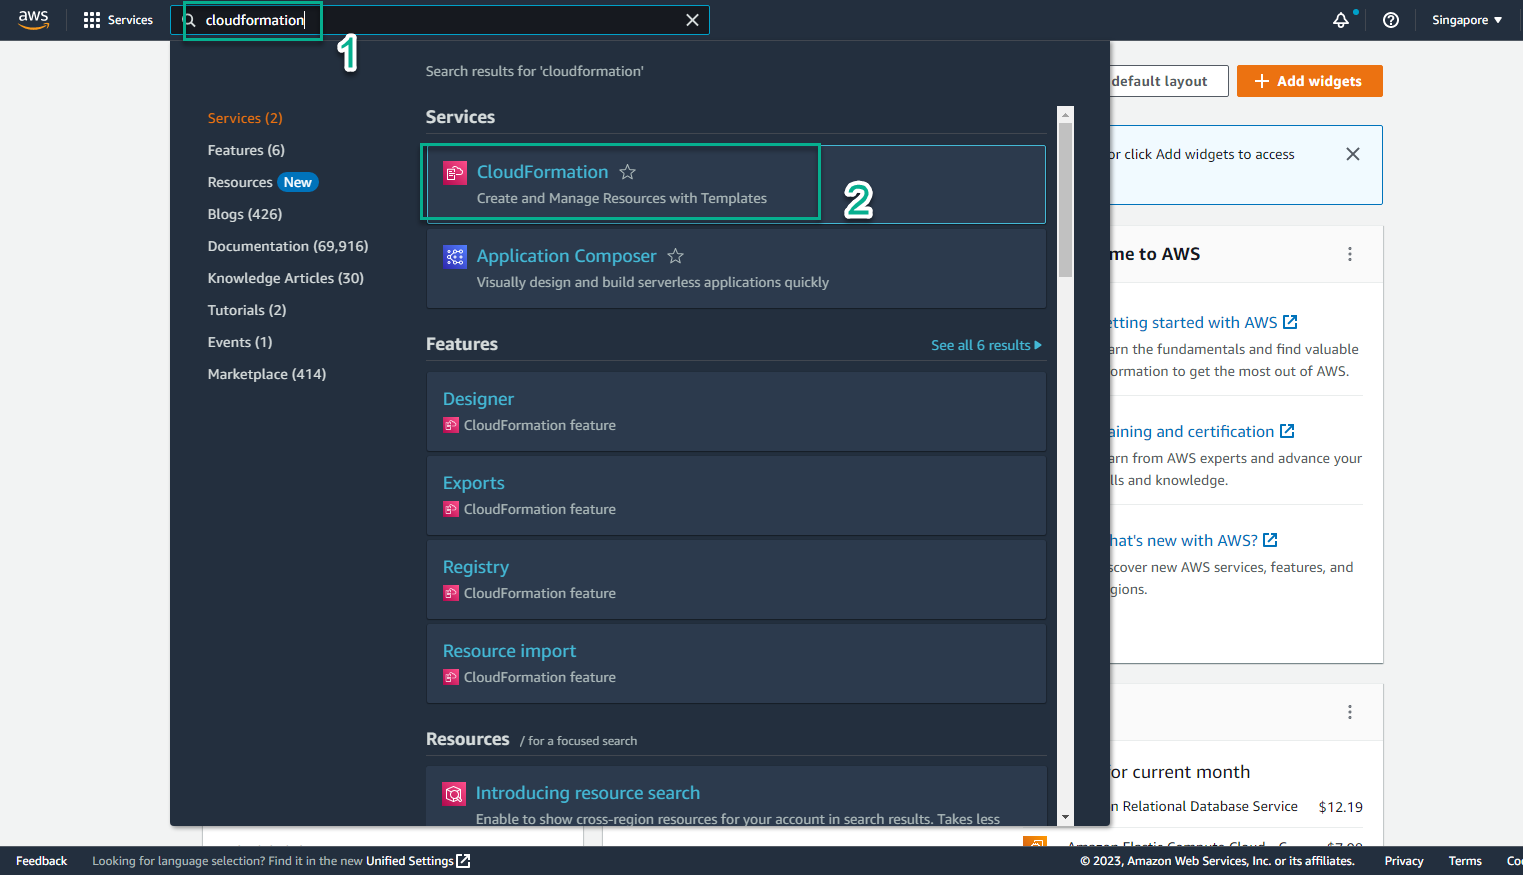
- Truy cập giao diện AWS Management Console
- Tìm CloudFormation
- Chọn CloudFormation
- Xem các stack đã tạo
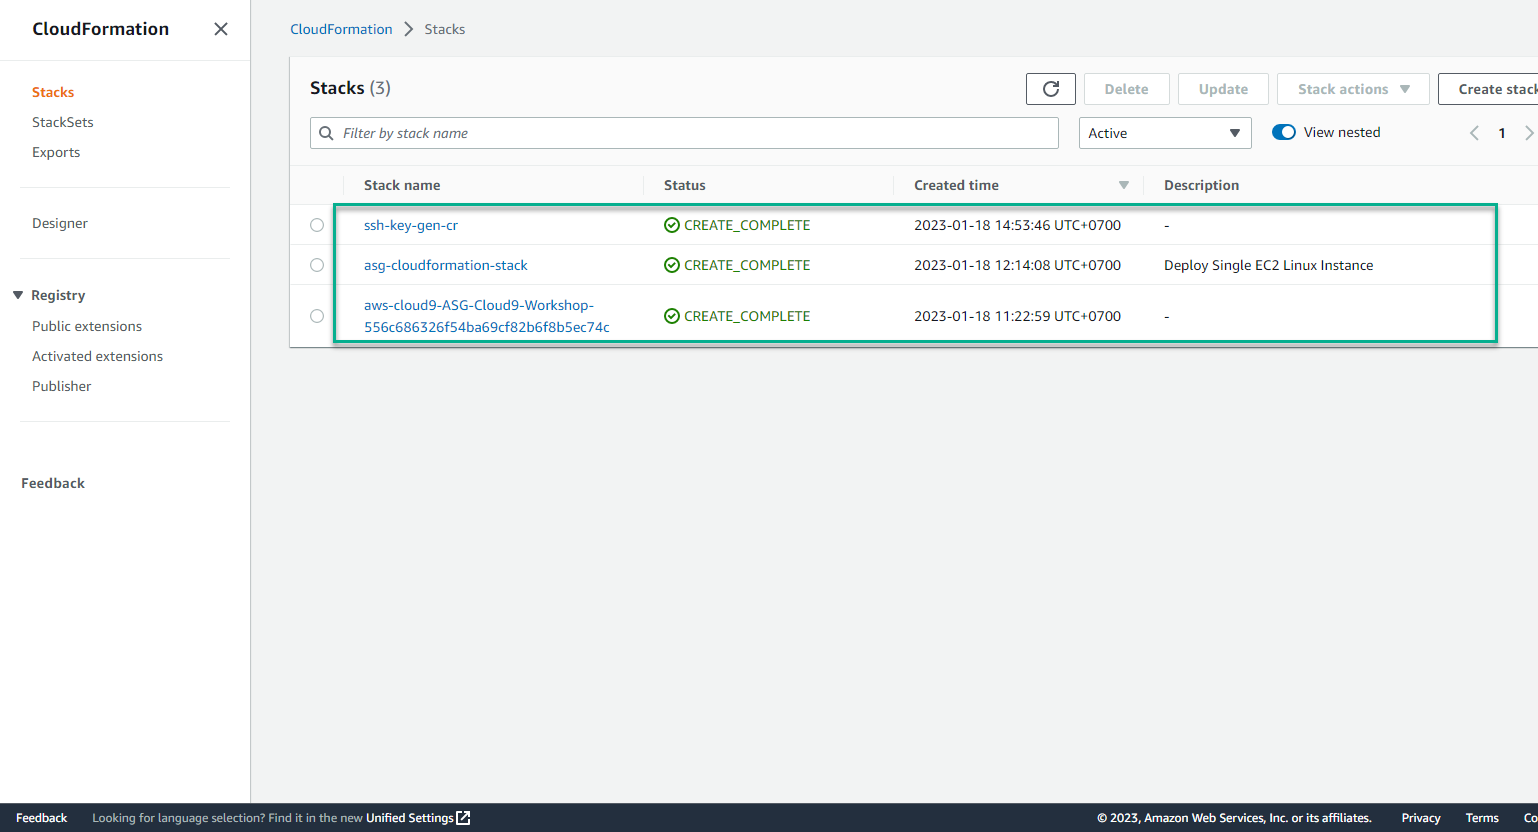
- Trong giao diện CloudFormation
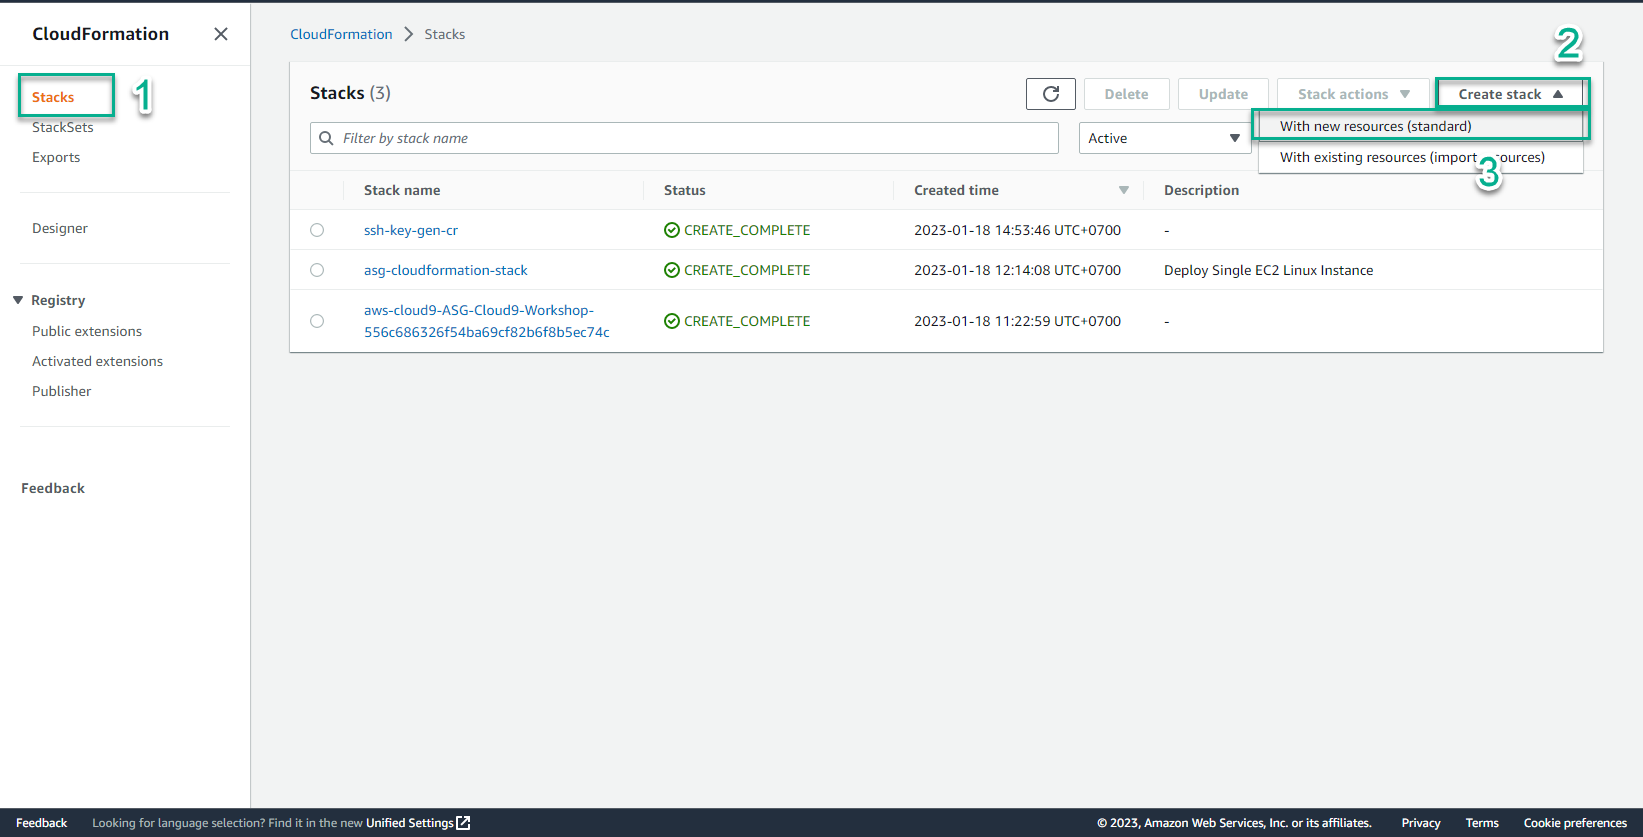
- Chọn Stack
- Chọn Create stack
- Chọn With new resource (standard)
- Trong giao diện Create stack
- CloudFormation template sẽ gọi tới 2 file YAML được viết bởi AWS giúp xác định IAM roles cần thiết cho việc triển khai StackSet.
- Tạo một file mapping_stackset_iam.yaml
- Sau đó sao chép và dán nội dụng mã này vào file đồng thời lưu lại:
AWSTemplateFormatVersion: '2010-09-09'
Description: This CloudFormation StackSet deploys two AWS provided CloudFormation templates that add Administrator and Execution Roles required to use AWSCloudFormationStackSetAdministrationRole
Resources:
  AWSCloudFormationStackSetAdministrationRole:
    Type: AWS::CloudFormation::Stack
    Properties:
      TemplateURL: https://s3.amazonaws.com/cloudformation-stackset-sample-templates-us-east-1/AWSCloudFormationStackSetAdministrationRole.yml
      TimeoutInMinutes: '3'
  AWSCloudFormationStackSetExecutionRole:
    Type: AWS::CloudFormation::Stack
    Properties:
      TemplateURL: https://s3.amazonaws.com/cloudformation-stackset-sample-templates-us-east-1/AWSCloudFormationStackSetExecutionRole.yml
      TimeoutInMinutes: '3'
      Parameters:
        AdministratorAccountId : !Ref 'AccountID'
Parameters:
  AccountID:
      Type: String
      Description: Your AWS Account ID
      MaxLength: 12
      MinLength: 12
-
Bạn có thể tham khảo các template cấu hình Role ở đây:
-
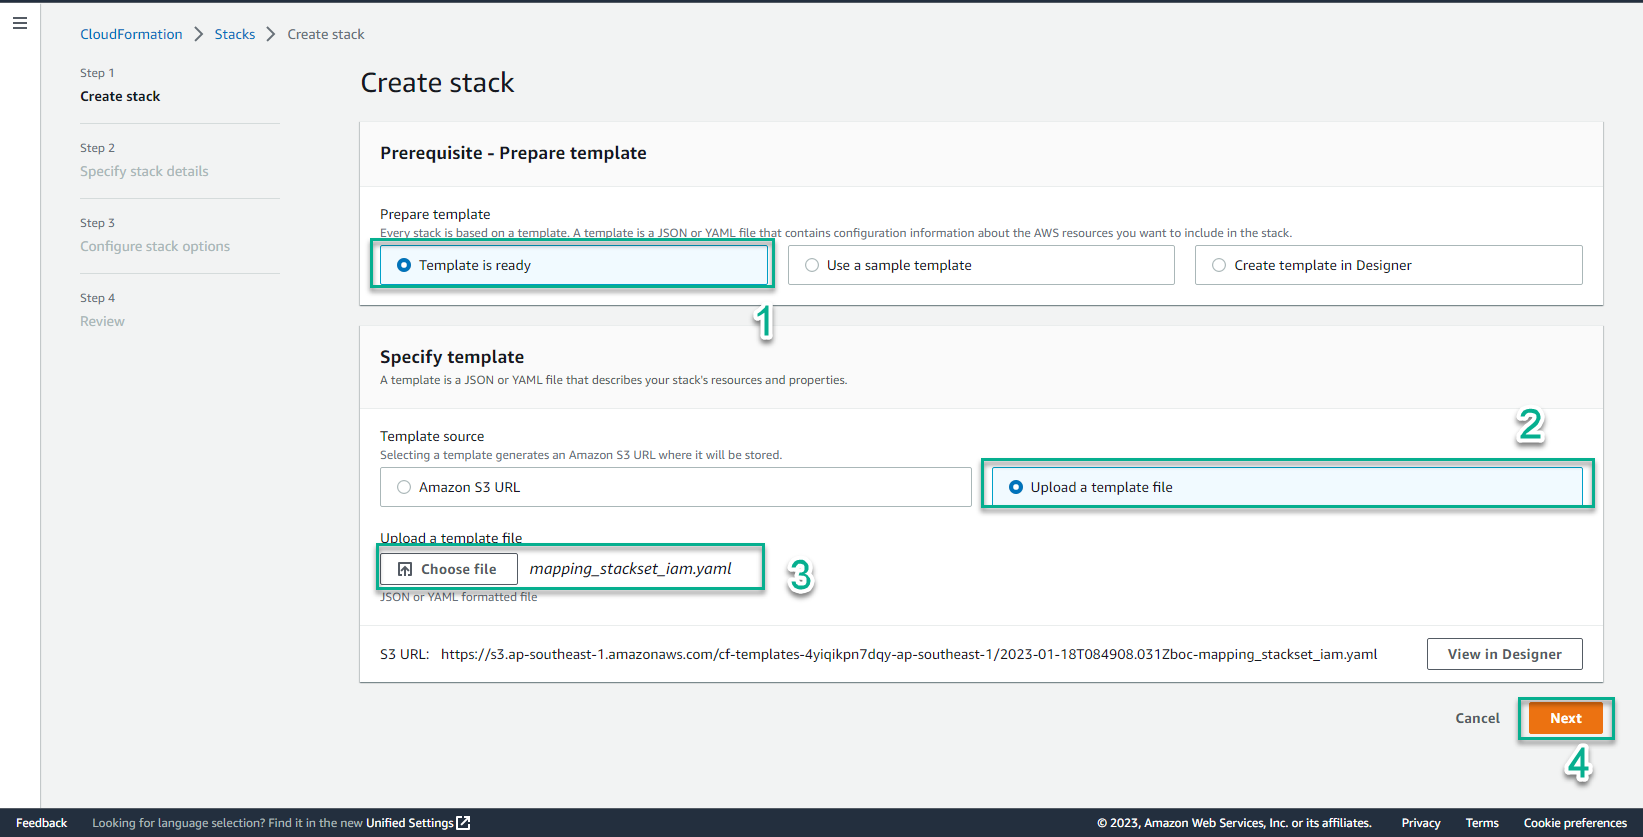
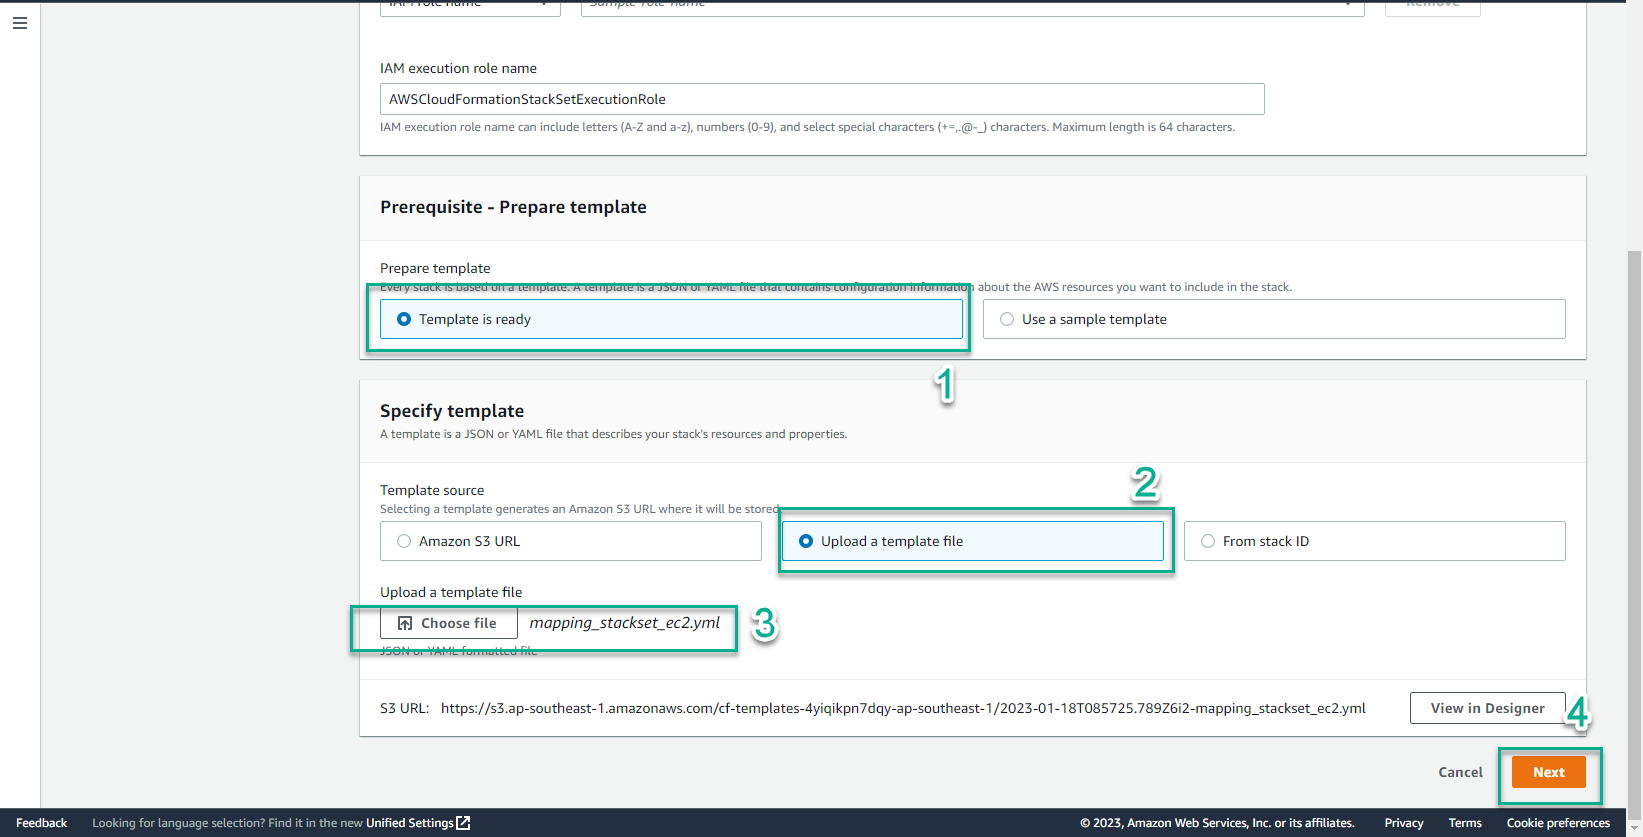
Chọn Template is ready
-
Chọn Upload a template file
-
Chọn Choose file
-
Chọn mapping_stackset_iam.yaml
-
Chọn Next
- Trong giao diện Specify stack details
- Stack name, nhập
mapping-stacksets-iam - AccountID, nhập account id của bạn
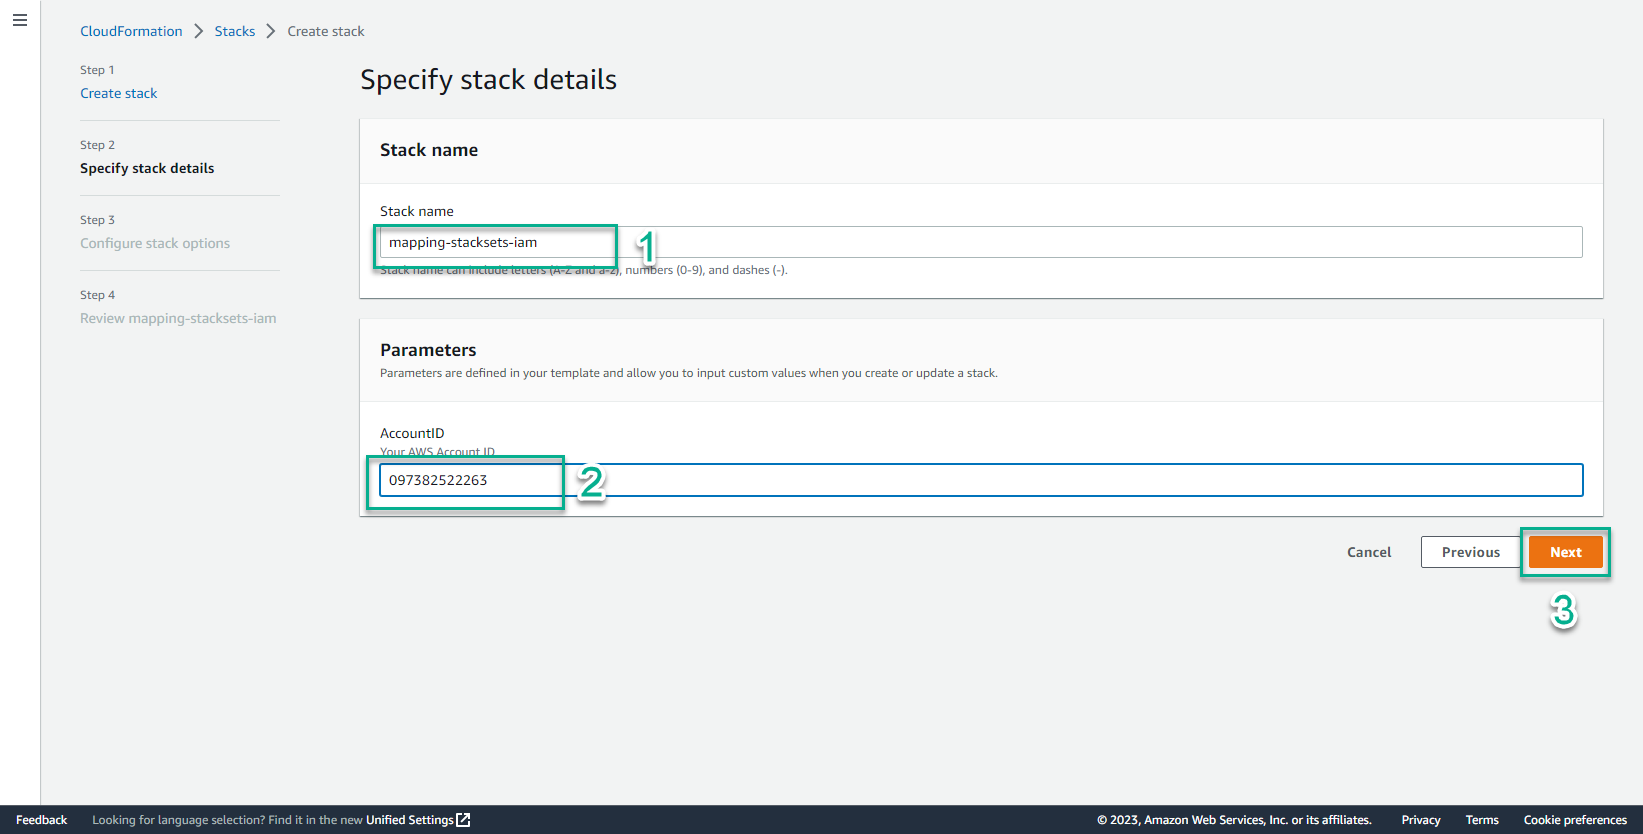
- Chọn Next
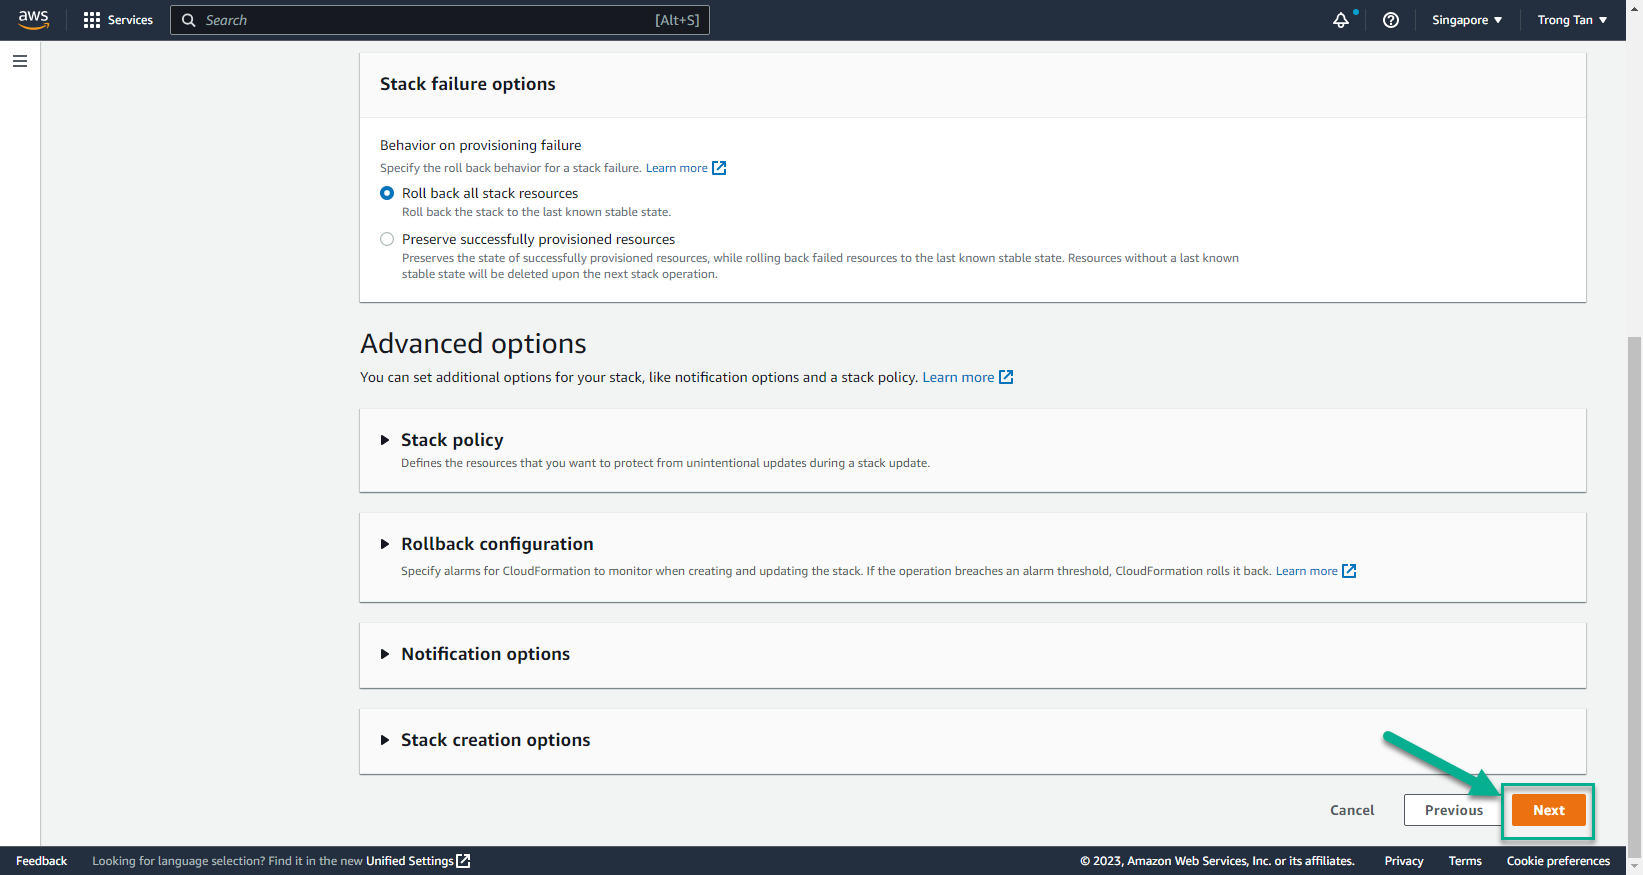
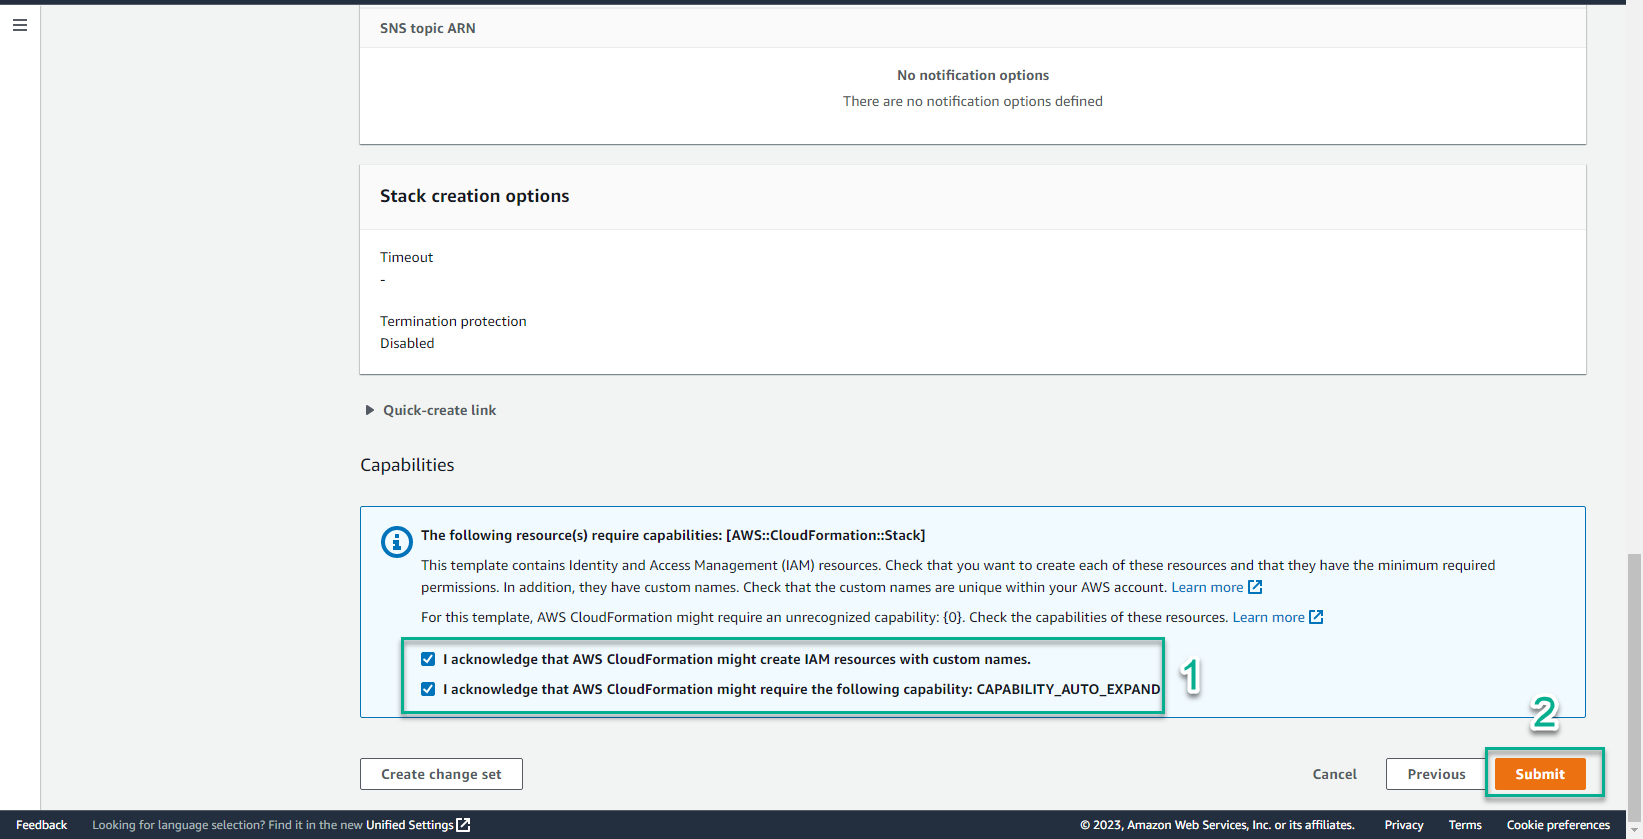
- Trong giao diện Create stack
- Chọn I acknowledge that AWS CloudFormation might create IAM resources with custom names
- Chọn I acknowledge that AWS CloudFormation might require the following capability: CAPABILITY_AUTO_EXPAND
- Chọn Create stack
- Khoảng vài phút sau, 2 CloudFormation template đã được tạo thành công cùng với Stack.
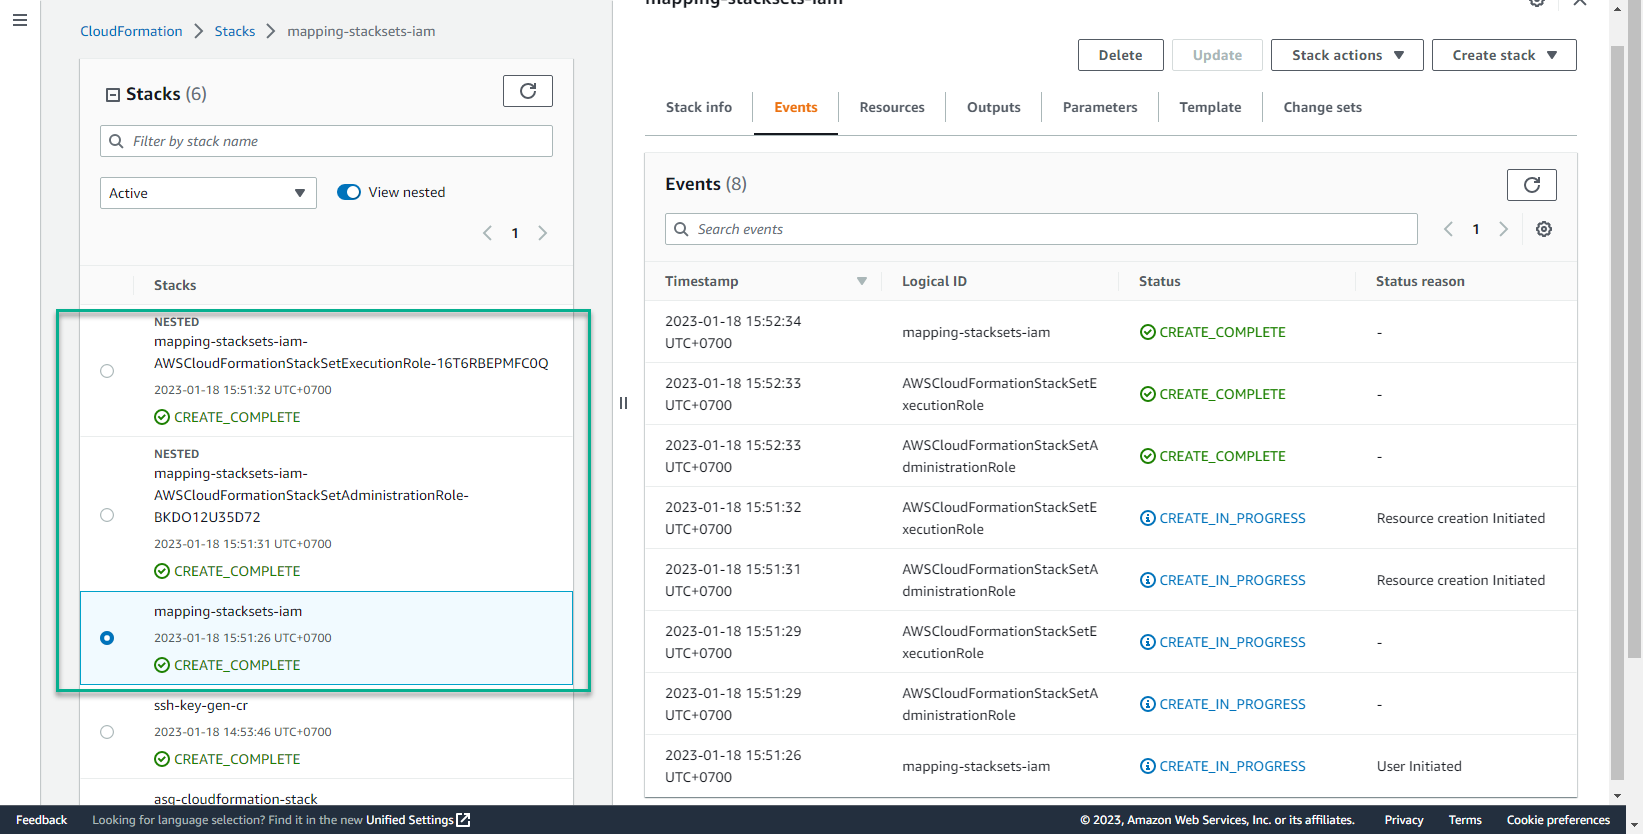
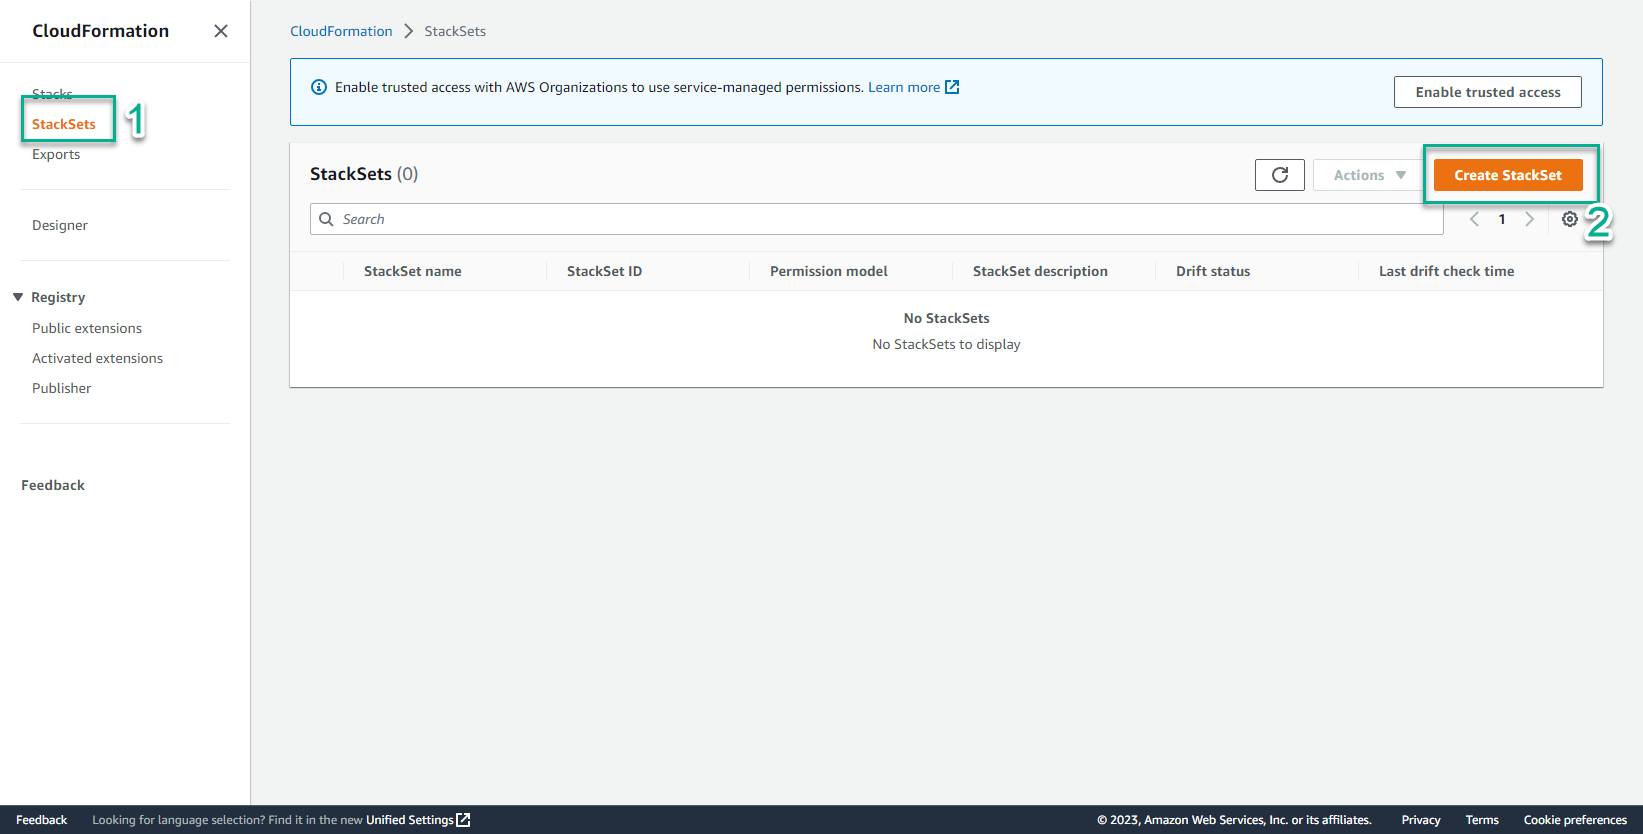
- Trong giao diện CloudFormation
- Chọn Stackset
- Xem giao diện Stackset
- Chọn Stackset
- Trong giao diện Choose a template
- Bước Permissions, chọn IAM role name
- Chọn IAM execution role name
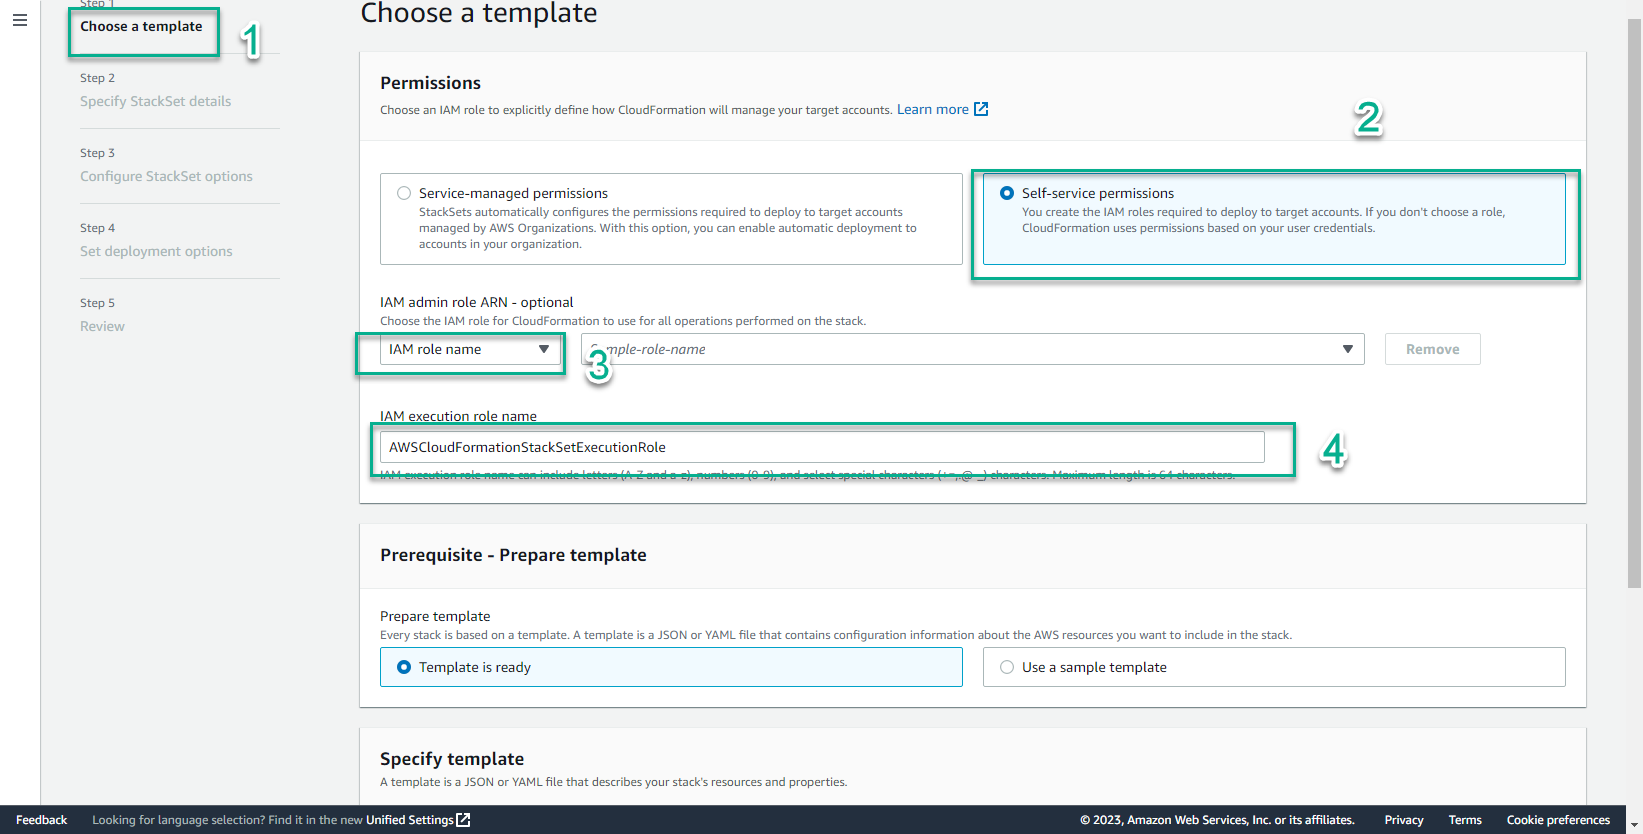
- Trong giao diện Prerequisite
- Tạo 1 file yaml có tên mapping_stackset_ec2.yml
- Sao chép nội dung đoạn mã sau vào file mapping_stackset_ec2.yml
AWSTemplateFormatVersion: 2010-09-09
Description: This YAML template provisions an Amazon Linux 2 AMI and installs httpd to demonstrate proper operation in various AWS regions
Parameters:
SourceAccessCIDR:
Type: String
Description: The CIDR IP range that is permitted to access the instance. We recommend that you set this value to a trusted IP range.
Default: 0.0.0.0/0
Mappings:
# Mapping of Amazon Linux 2 AMI IDs in every AWS Region
# When deploying a StackSet, the template will automatically deploy the proper AMI in each selected region
RegionMap:
us-east-1:
AMI: ami-04681a1dbd79675a5
us-east-2:
AMI: ami-0cf31d971a3ca20d6
us-west-1:
AMI: ami-0782017a917e973e7
us-west-2:
AMI: ami-6cd6f714
ap-south-1:
AMI: ami-00b6a8a2bd28daf19
ap-northeast-3:
AMI: ami-00f7ef6bf92e8f916
ap-northeast-2:
AMI: ami-012566705322e9a8e
ap-southeast-1:
AMI: ami-01da99628f381e50a
ap-southeast-2:
AMI: ami-00e17d1165b9dd3ec
ap-northeast-1:
AMI: ami-08847abae18baa040
ca-central-1:
AMI: ami-ce1b96aa
eu-central-1:
AMI: ami-0f5dbc86dd9cbf7a8
eu-west-1:
AMI: ami-0bdb1d6c15a40392c
eu-west-2:
AMI: ami-e1768386
eu-west-3:
AMI: ami-06340c8c12baa6a09
sa-east-1:
AMI: ami-0ad7b0031d41ed4b9
Resources:
MyEC2Instance:
Type: AWS::EC2::Instance
Properties:
InstanceType: t2.micro
ImageId: !FindInMap
# !FindInMap will search the above RegionMap and automatically pick the proper AMI ID based on the region where this templte is being deployed
- RegionMap
- !Ref 'AWS::Region'
- AMI
SecurityGroupIds:
- !Ref EC2InstanceSG
UserData:
'Fn::Base64': !Sub |
#!/bin/bash -ex
sudo yum install httpd -y
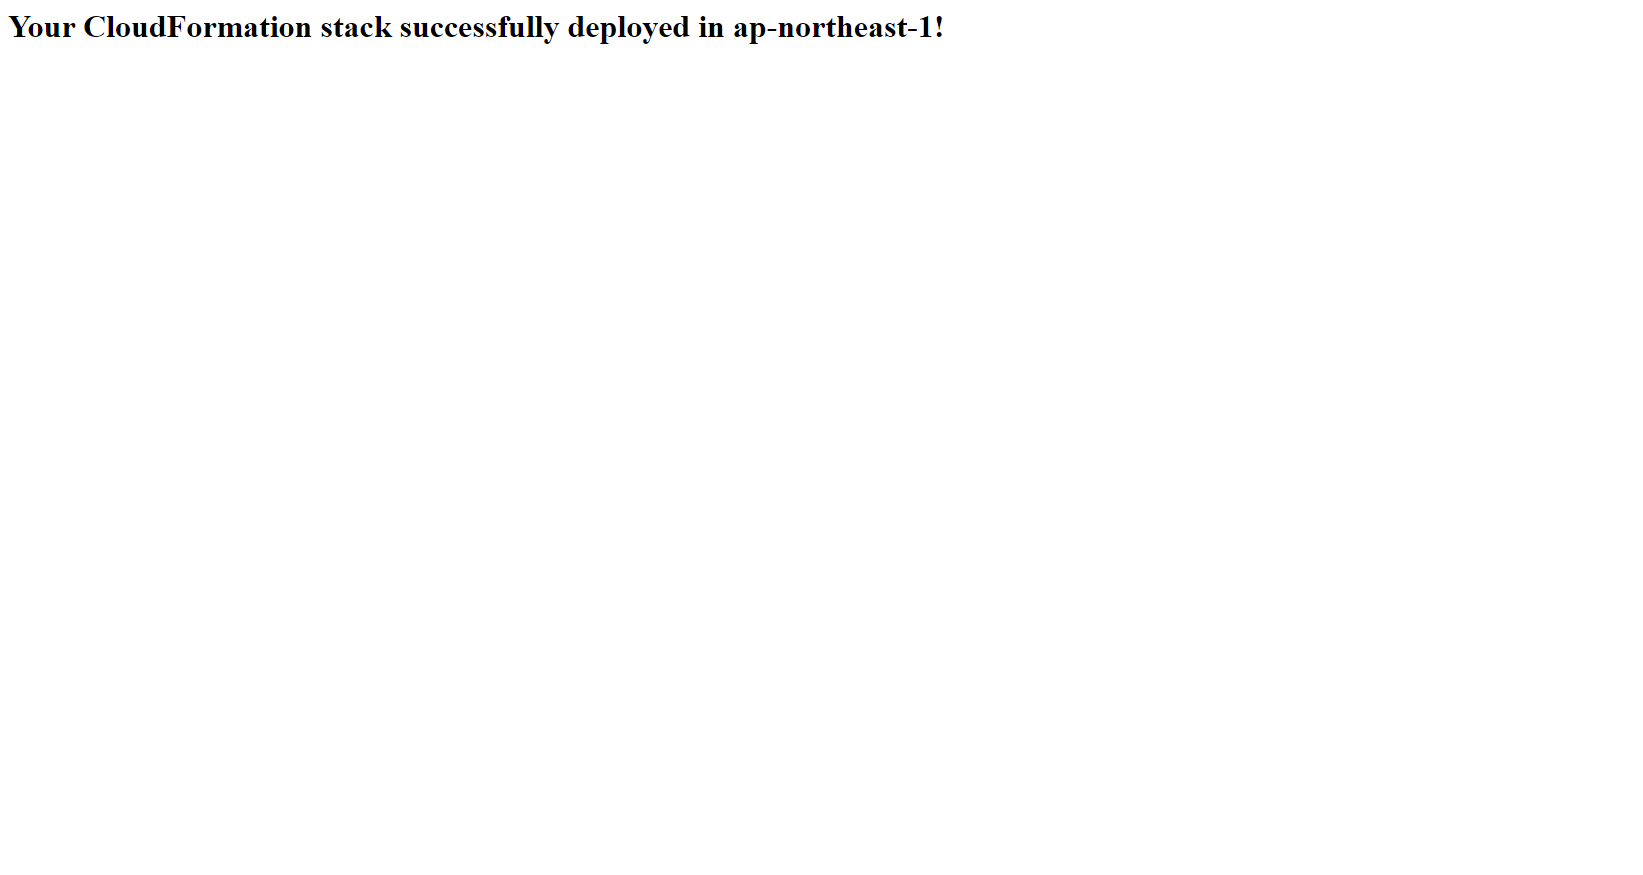
echo '<html><h1>Your CloudFormation stack successfully deployed in ${AWS::Region}!</h1></html>' >/var/www/html/index.html
service httpd start
Tags:
- Key: Name
Value: !Sub ${AWS::StackName}
EC2InstanceSG:
Type: AWS::EC2::SecurityGroup
Properties:
GroupDescription: This SG allows you to verify the webserver is operational by allowing HTTP (TCP 80) traffic from your location
Tags:
- Key: Name
Value: !Sub ${AWS::StackName}
SecurityGroupIngress:
-
Description: Permits HTTP traffic to validate that the installed webserver is operational.
CidrIp: !Ref SourceAccessCIDR
FromPort: 80
IpProtocol: tcp
ToPort: 80
Outputs:
Website:
Description: Webserver URL
Value: !Sub 'http://${MyEC2Instance.PublicDnsName}'
- Lưu file mapping_stackset_ec2.yml
- Chọn Template is ready
- Template source, chọn Upload a template file
- Chọn Choose file
- Chọn mapping_stackset_ec2.yml
- Chọn Next
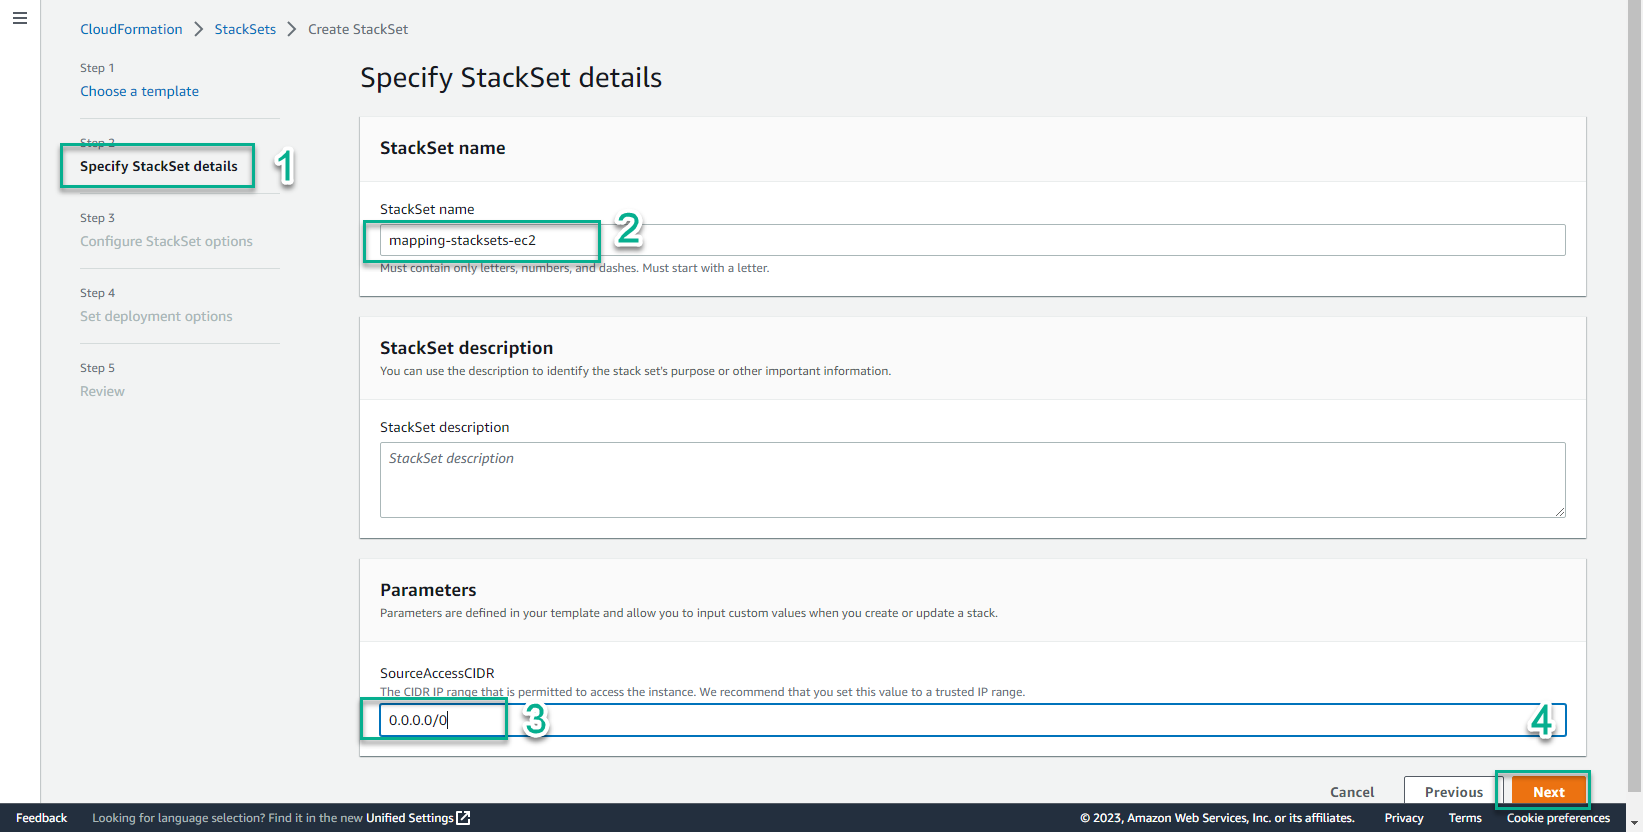
- Trong giao diện Specify StackSet details
- StackSet name, nhập
mapping-stacksets-ec2 - Chọn Next
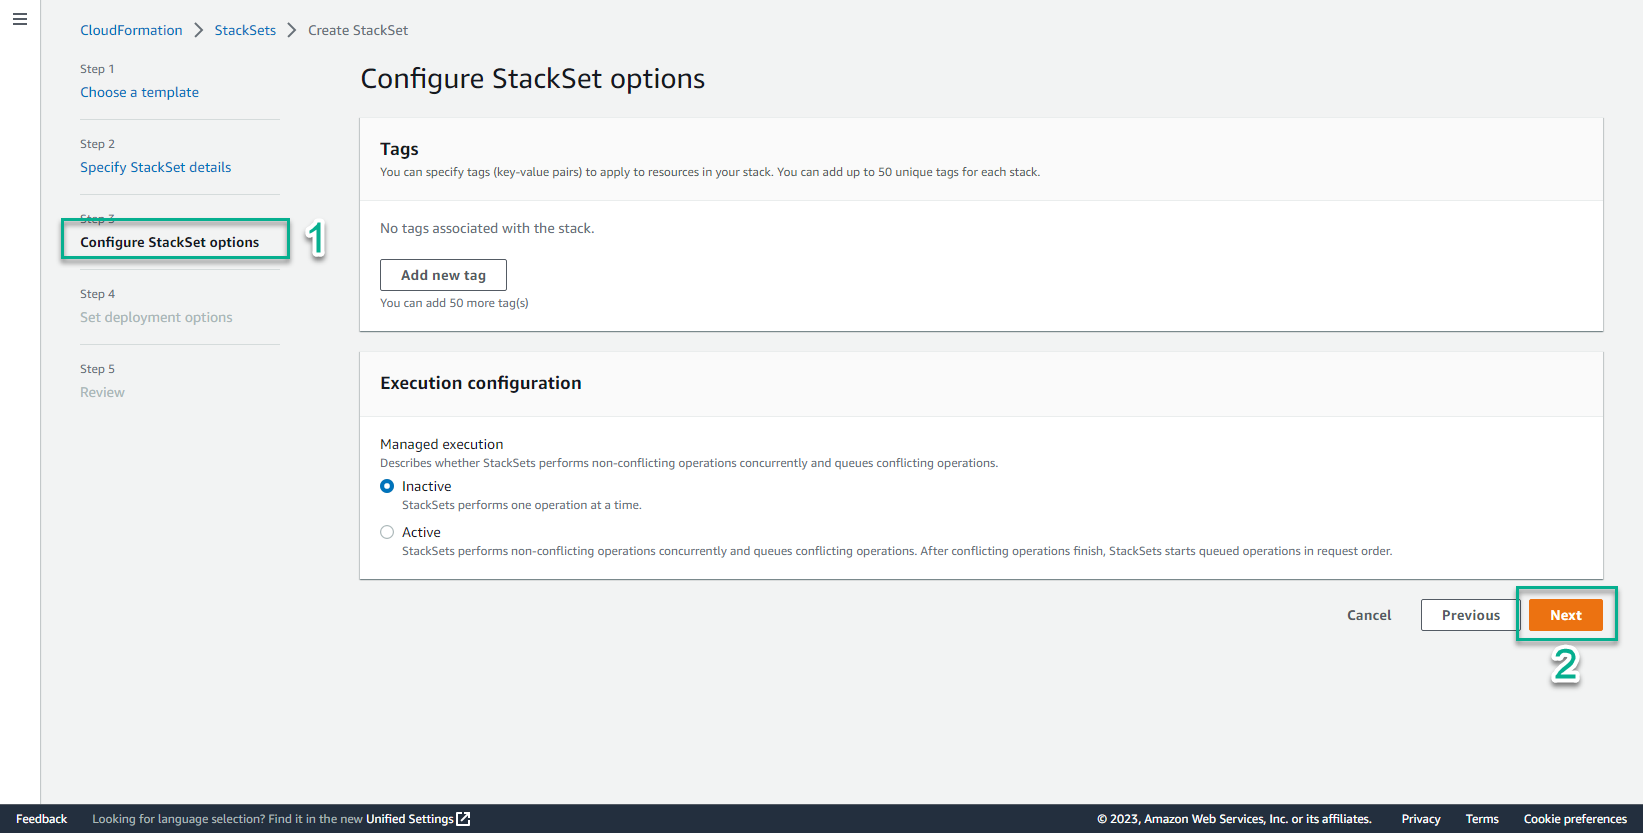
- Chọn Next
- Trong giao diện Set deployment options
- Add stacks to stack set, chọn Deploy new stack
- Account, chọn Deploy stack in accounts
- Account numbers, nhập account number của bạn

- Trong giao diện Specify region
- Chọn các region bạn muốn triển khai
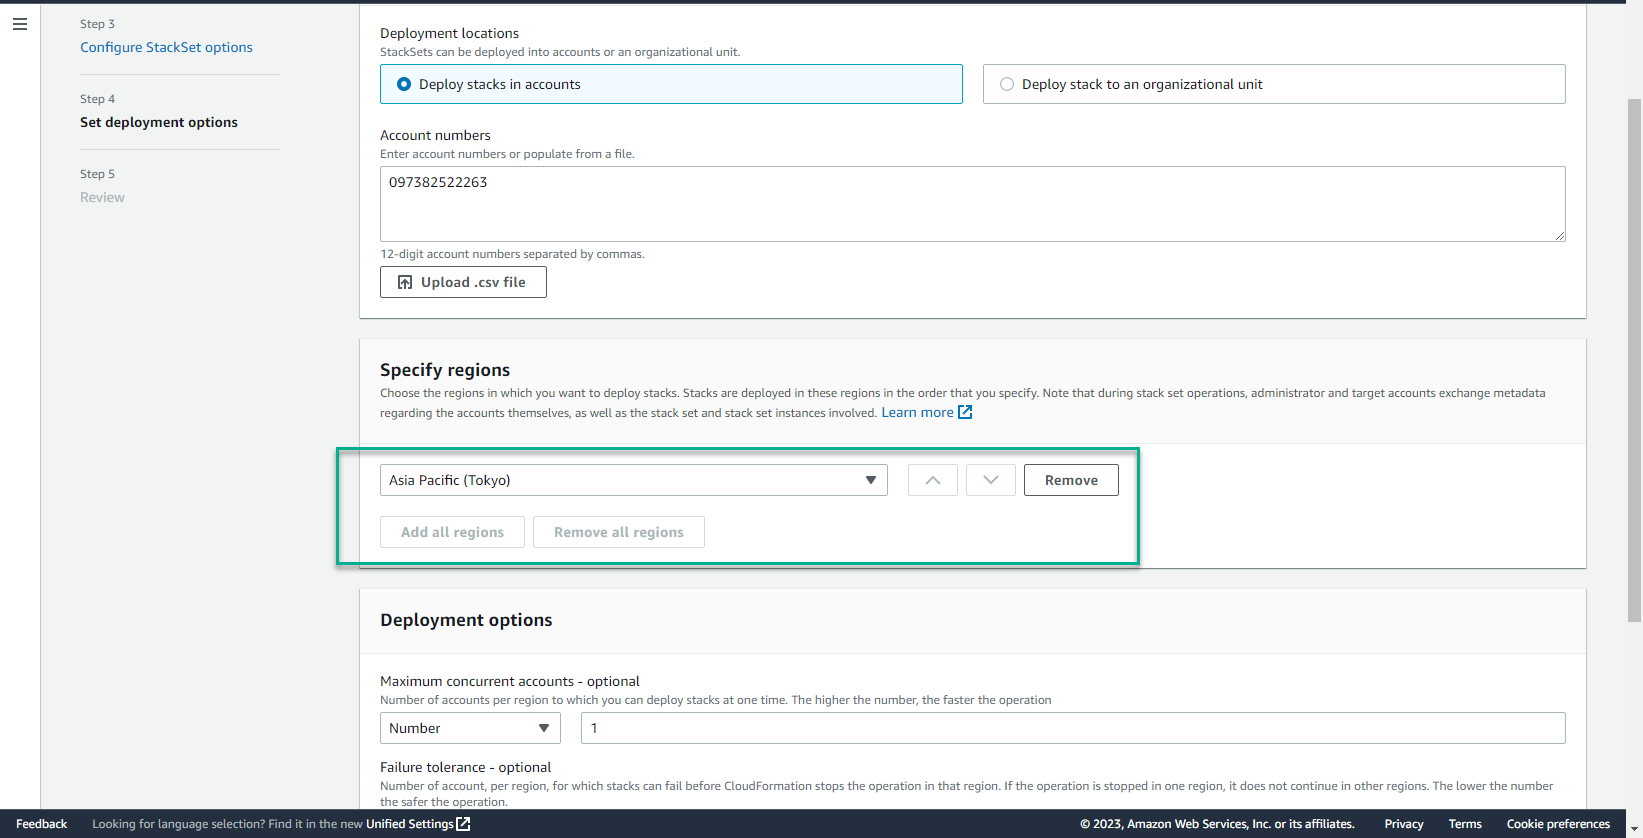
- Trong giao diện Deployment options
- Chọn Next
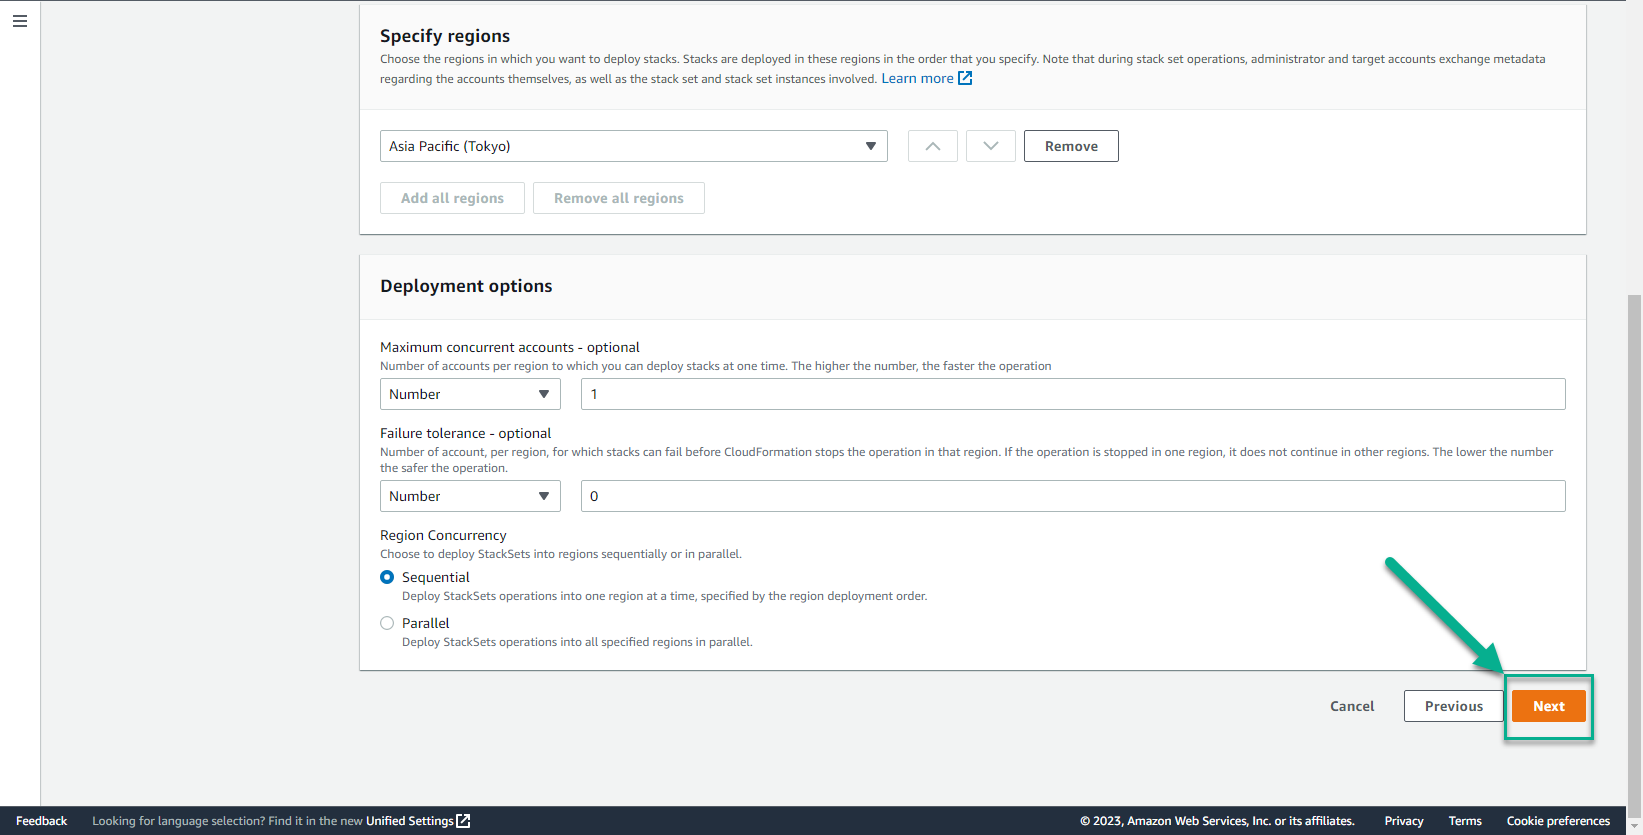
- Chọn Submit

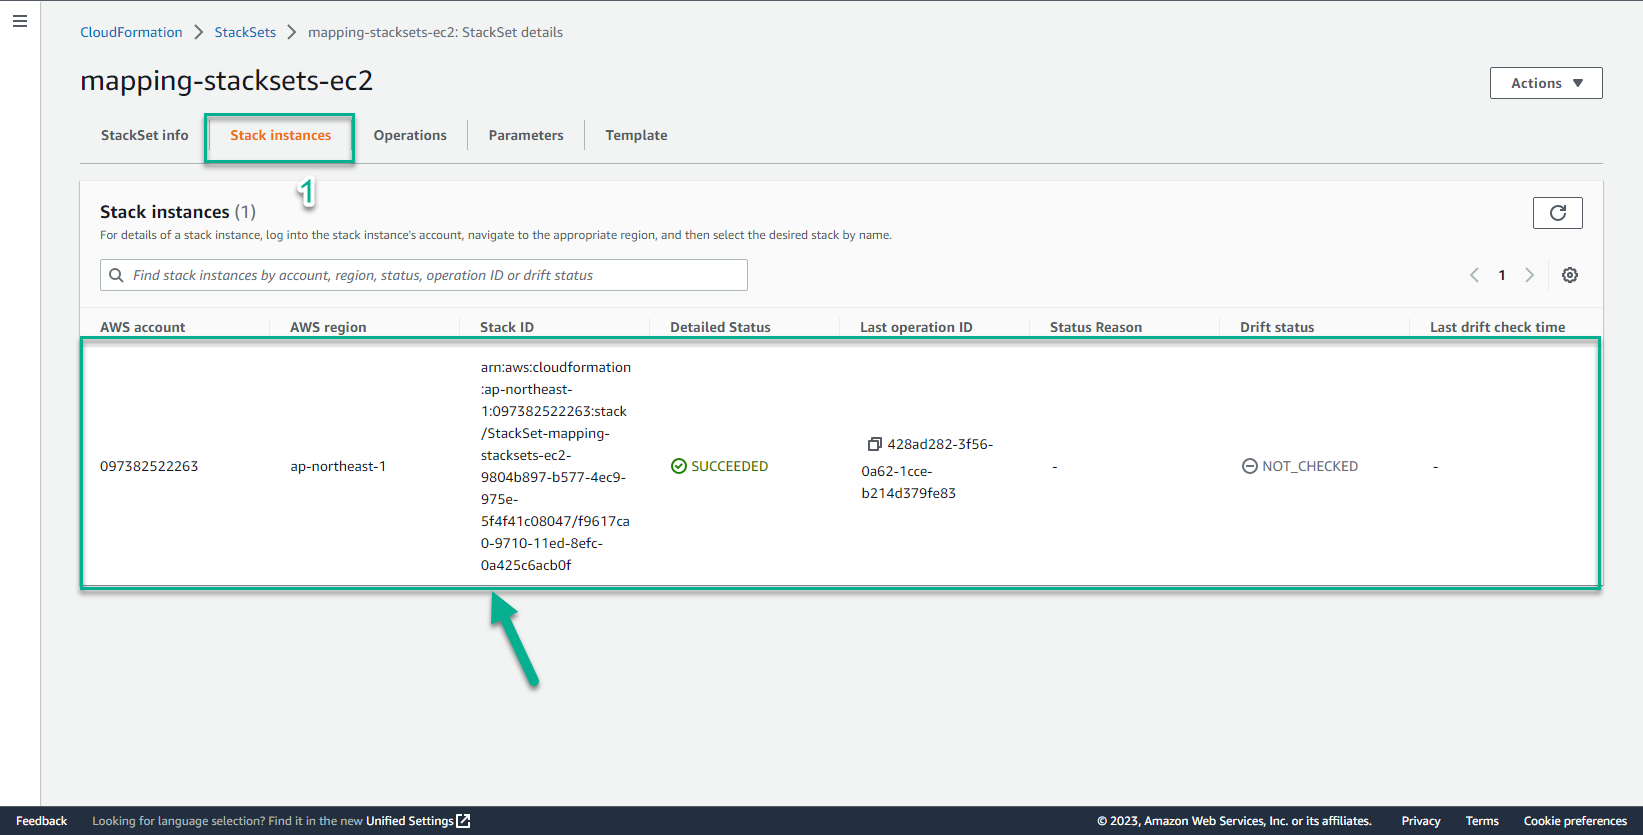
- Tiến trình khởi tạo StackSet sẽ mất khoảng 5 phút cho đến khi thấy được màn hình tương tự bên dưới.
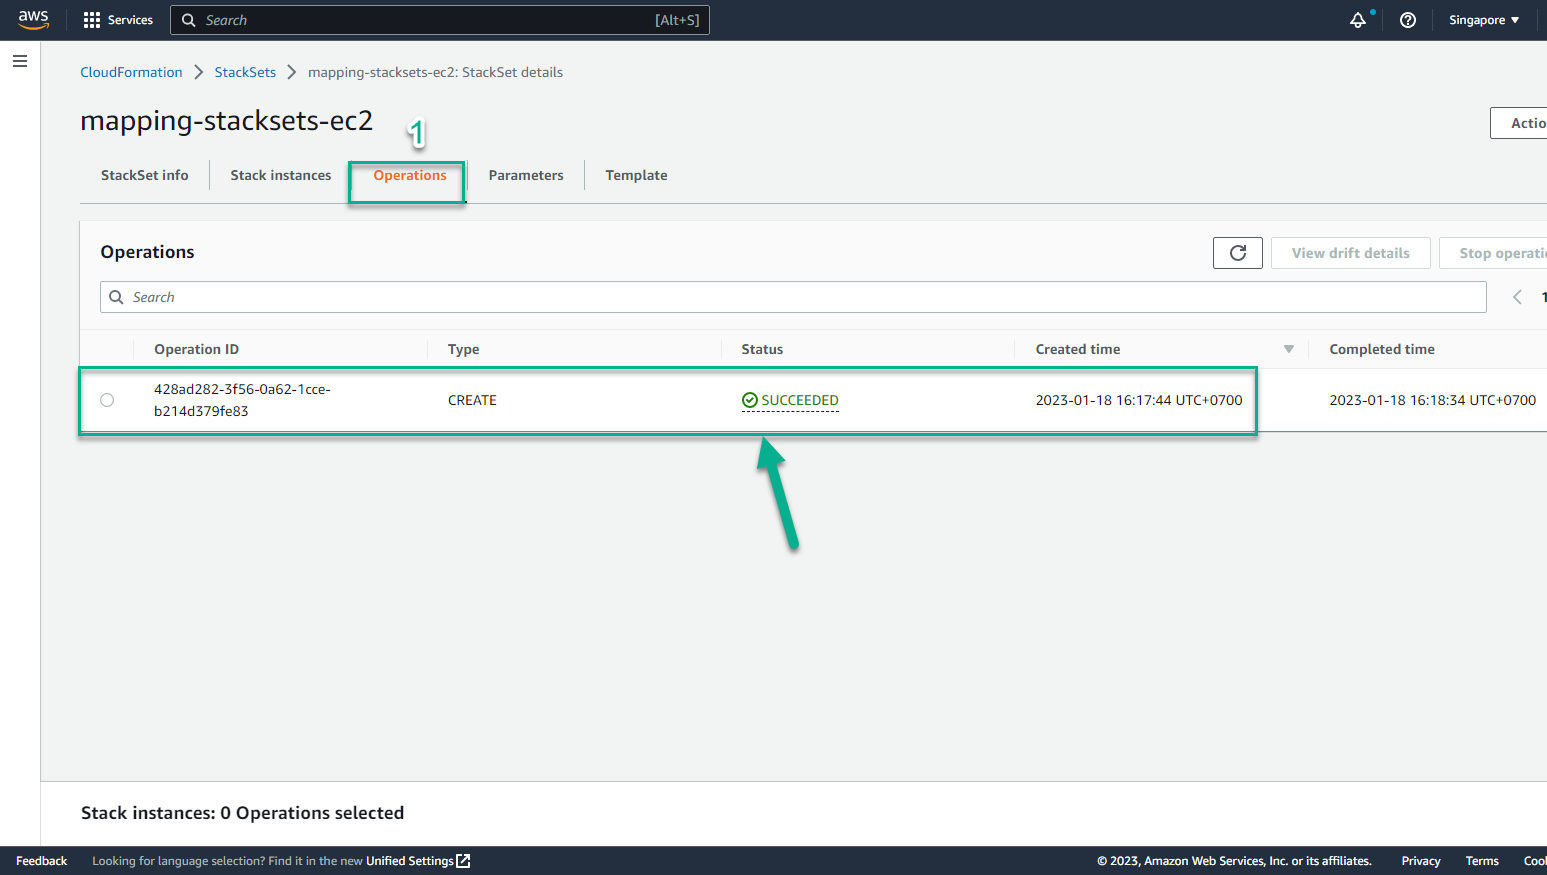
- Region bạn chọn đều được triển khai StackSet thành công
- Trong giao diện CloudFormation
- Chọn Region Asia Pacific-Tokyo
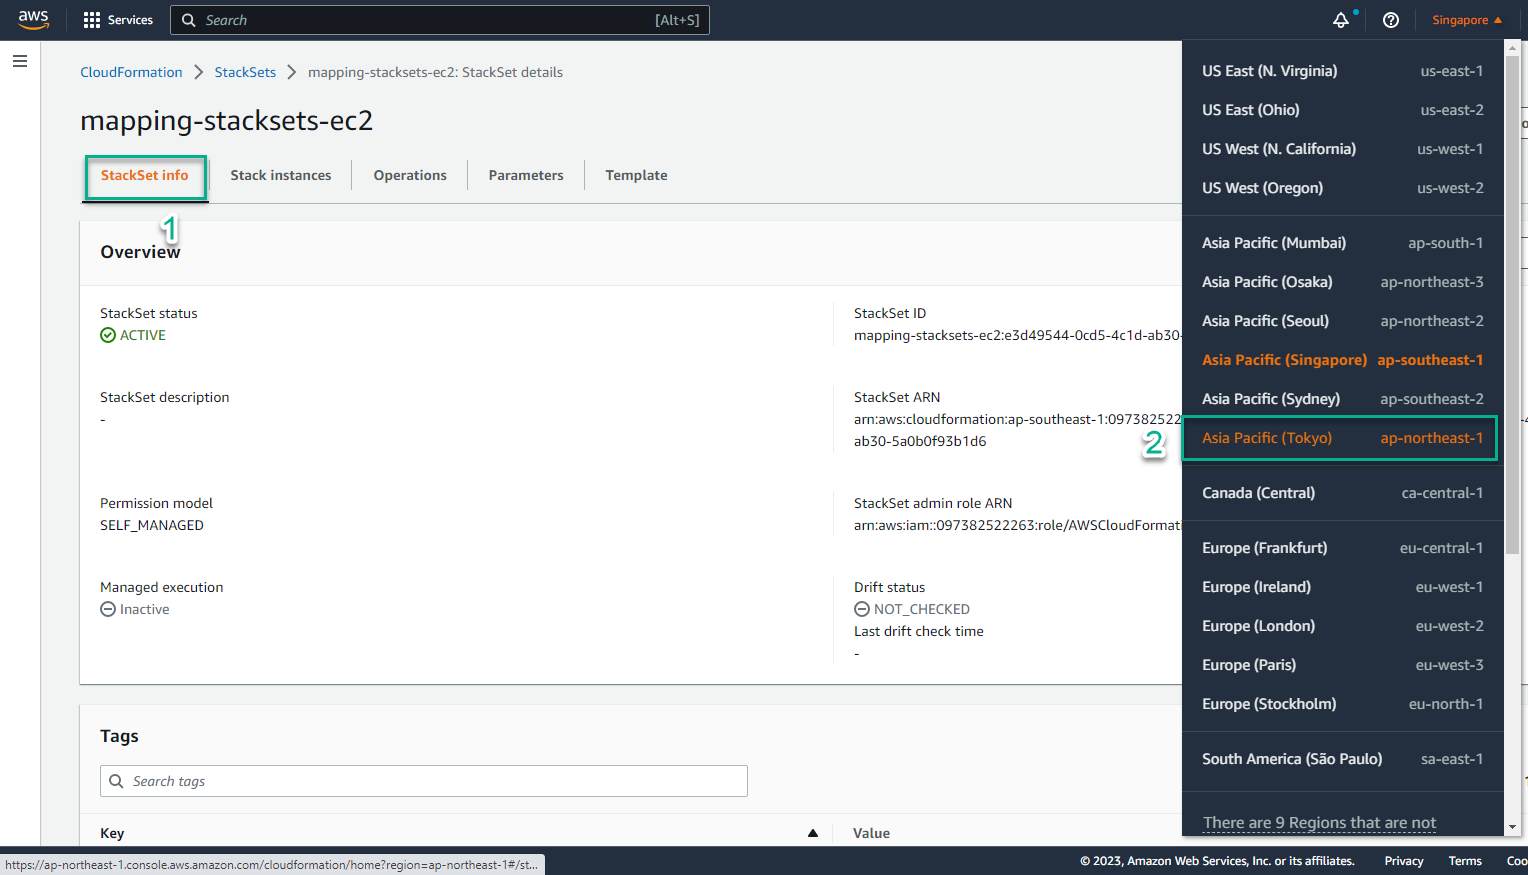
- Trong Region Asia Pacific-Tokyo
- Chọn CloudFormation
- Chọn Stack
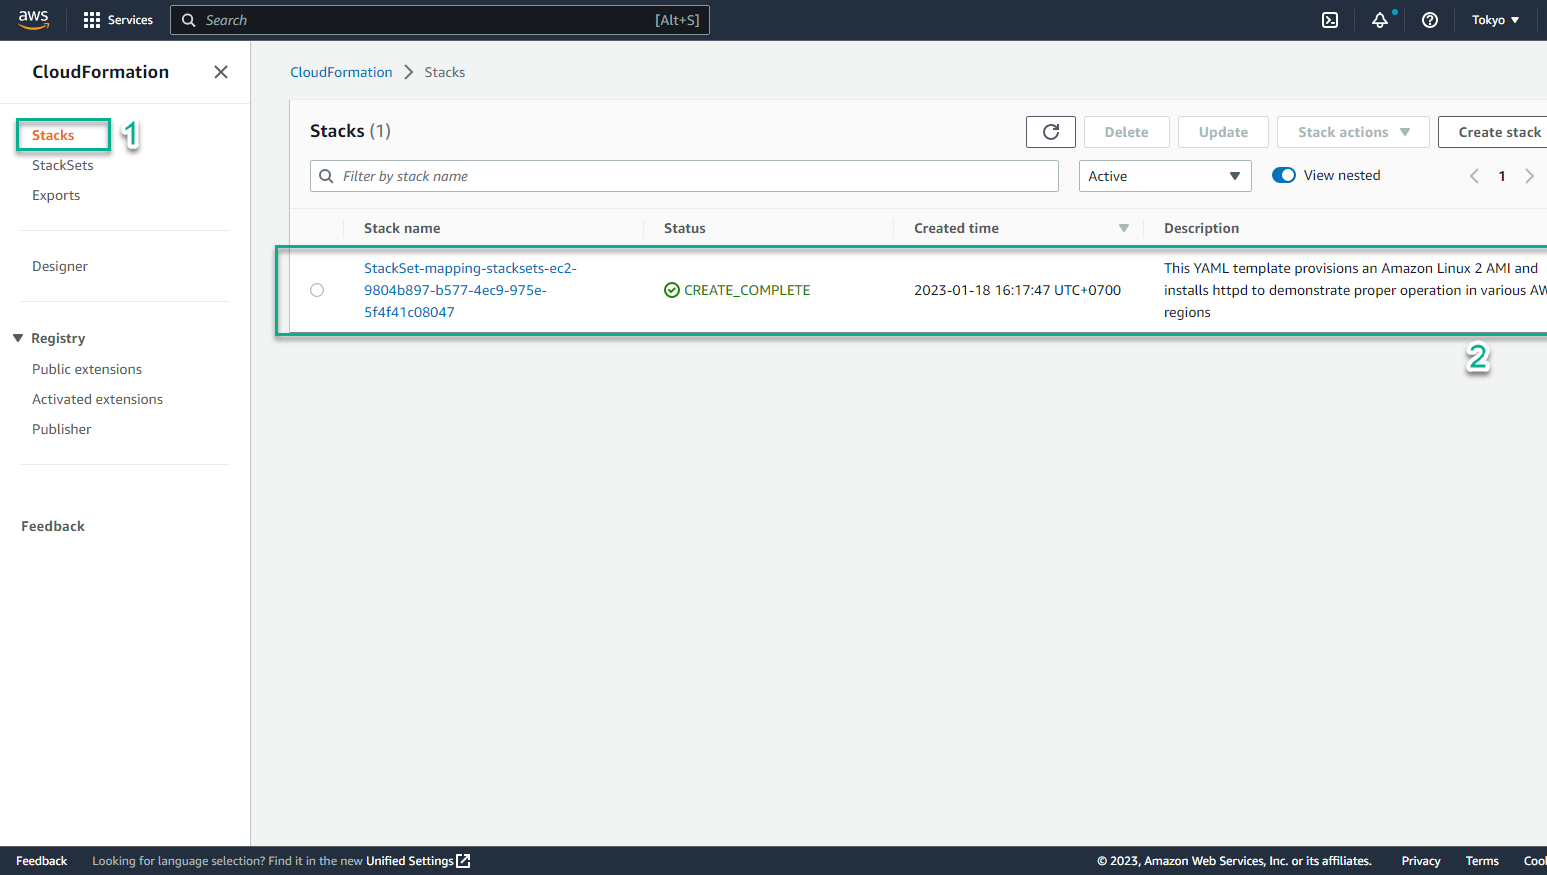
- Truy cập CloudFormation console trên Region Frankurt - là một trong những Region ta đã lựa chọn để triển khai StackSet - thì thấy một Stack mới đã được tạo ra. Điều này chứng tỏ StackSet của chúng ta đã được triển khai thành công.
- Trong giao diện CloudFormation
- Chọn tên Stack, nó sẽ dẫn ta tới trang thông tin chi tiết.
- Chuyển sang tab Output, ta sẽ thấy kết quả website và đường dẫn
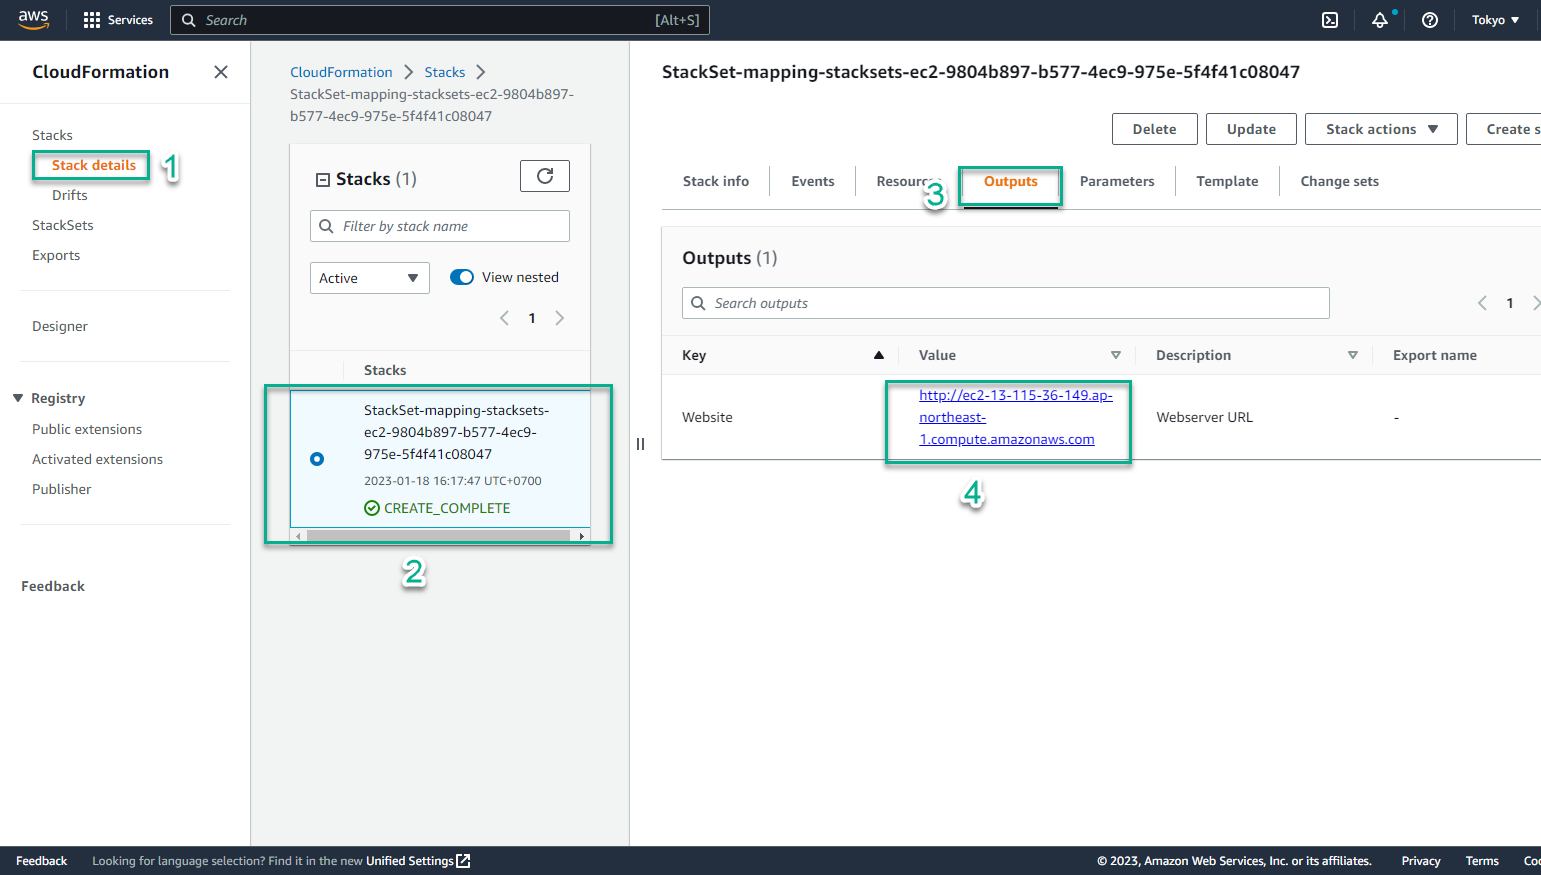
- Chọn đường dẫn và dán vào trình duyệt
- Kết quả thu được đúng với những gì chúng ta mong đợi. Việc triển khai StackSet đã thực sự thành công. Nếu các bạn đã đi được tới bước này thì xin chúc mừng các bạn!