Tạo CloudFormation Template
Tạo CloudFormation Template
Một trong những chìa khóa để làm việc hiệu quả với CloudFormation đó là phải biết được cách sử dụng bảng tham chiếu tài nguyên ở trang AWS Resource and Property Types Reference. Tại đây bạn có thể tìm thấy một danh sách thông tin và định nghĩa về các tài nguyên và các thuộc tính.
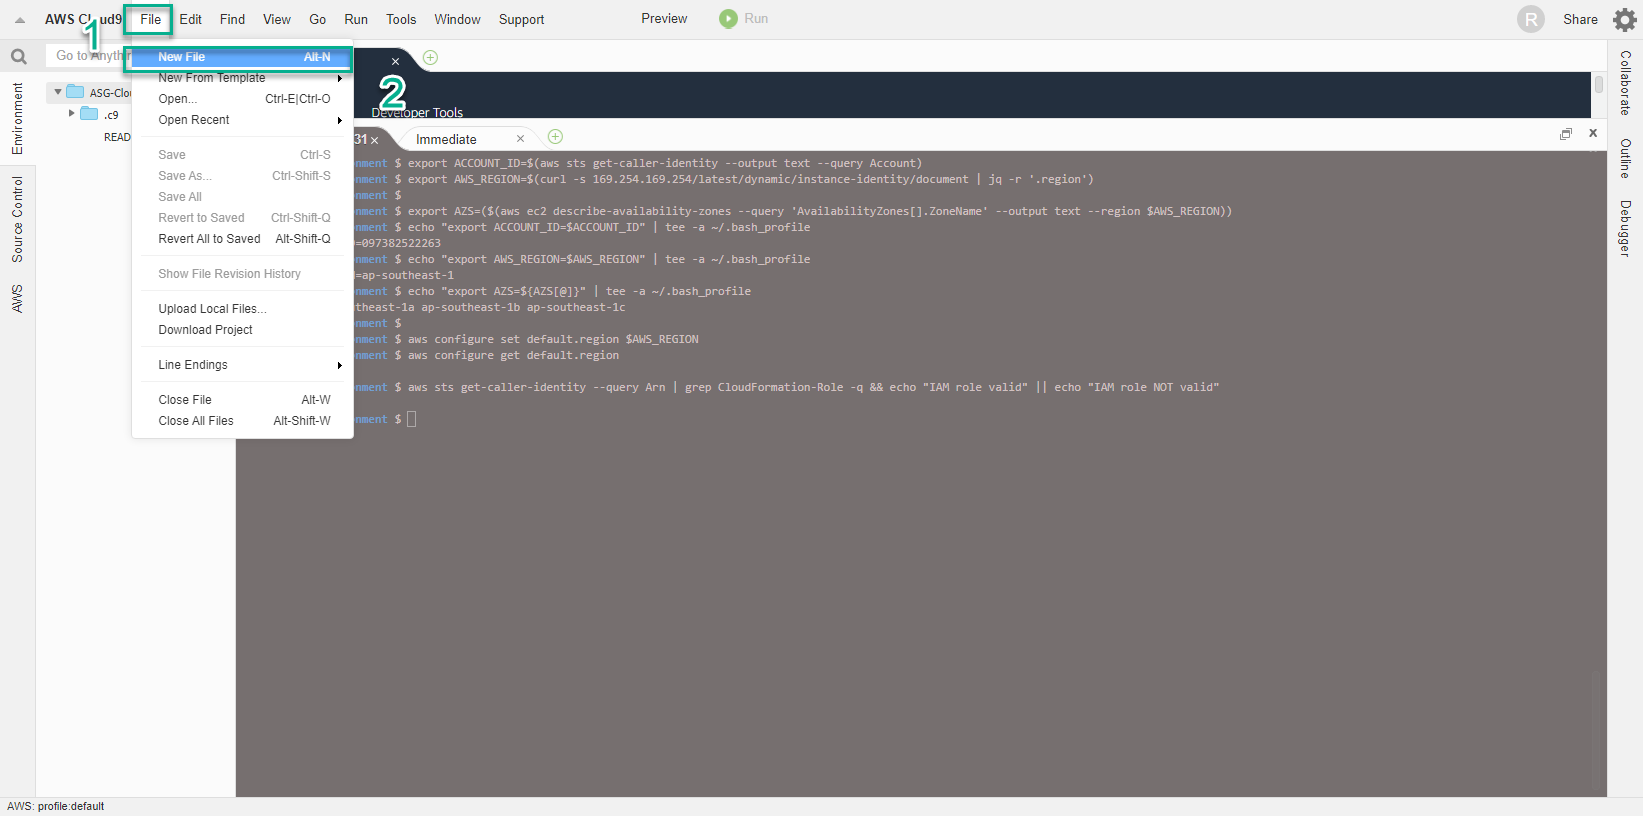
- Trong giao diện môi trường của AWS Cloud9
- Chọn File
- Chọn New File
- Một CloudFormation template thường bao gồm 9 phần, chi tiết về chúng bạn có thể xem ở Template anatomy. Trong phạm vi workshop, chúng ta chỉ quan tâm tới 5 thành phần chính sau đây:
-
Cấu trúc của một CloudFormation template
AWSTemplateFormatVersion (tùy chọn): chỉ ra phiên bản của template. Bản mới nhất là 2010-09-09 và mặc dù đã ra đời cách đây khá lâu vẫn được sử dụng cho tới thời điểm hiện tại.
Description (tùy chọn) mô tả thông tin liên quan tới template.
Parameters (tùy chọn): cho phép bạn bổ sung các giá trị tùy chọn vào template mỗi lần ta cấn tạo hoặc update stack.
Resources (bắt buộc): chỉ rõ những tài nguyên AWS nào bạn muốn đưa vào stack để deploy, ví dụ như Amazon EC2 instance hoặc một Amazon S3 bucket.
Outputs (tùy chọn) xác định những giá trị đầu ra mà bạn có thể import vào những stack khác (để tạo cross-stack references), hoặc làm nội dung phản hồi cho stack , hoặc dể hiển thị trên AWS CloudFormation console.
-
Template Parameters
Với mỗi parameter chúng ta phải chỉ rõ tên và loại cho parameter. Các loại parameter được hỗ trợ bao gồm: String, Number, CommaDelimitedList, List, AWS-Specific Parameter và SSM Parameter. Bên dưới là một số parameter chúng ta sử dụng trong workshop. Chúng bao gồm
EC2InstanceType - xác định loại Instance sẽ được sử dụng trong template.
LatestAmiId - cho phép tự động lấy AMI ID mới nhất và đưa nó vào template.
SubnetID - liệt kê tất cả các Subnet IDs khả dụng có trong region.
SourceLocation - quy định cách sử dụng regex trong thuộc tính AllowedPattern để đảm bảo giá trị nhập vào là thích hợp, cùng với các giá trị MinLength và MaxLength.
VPCID - liệt kê các VPCs có sẵn trong region.
-
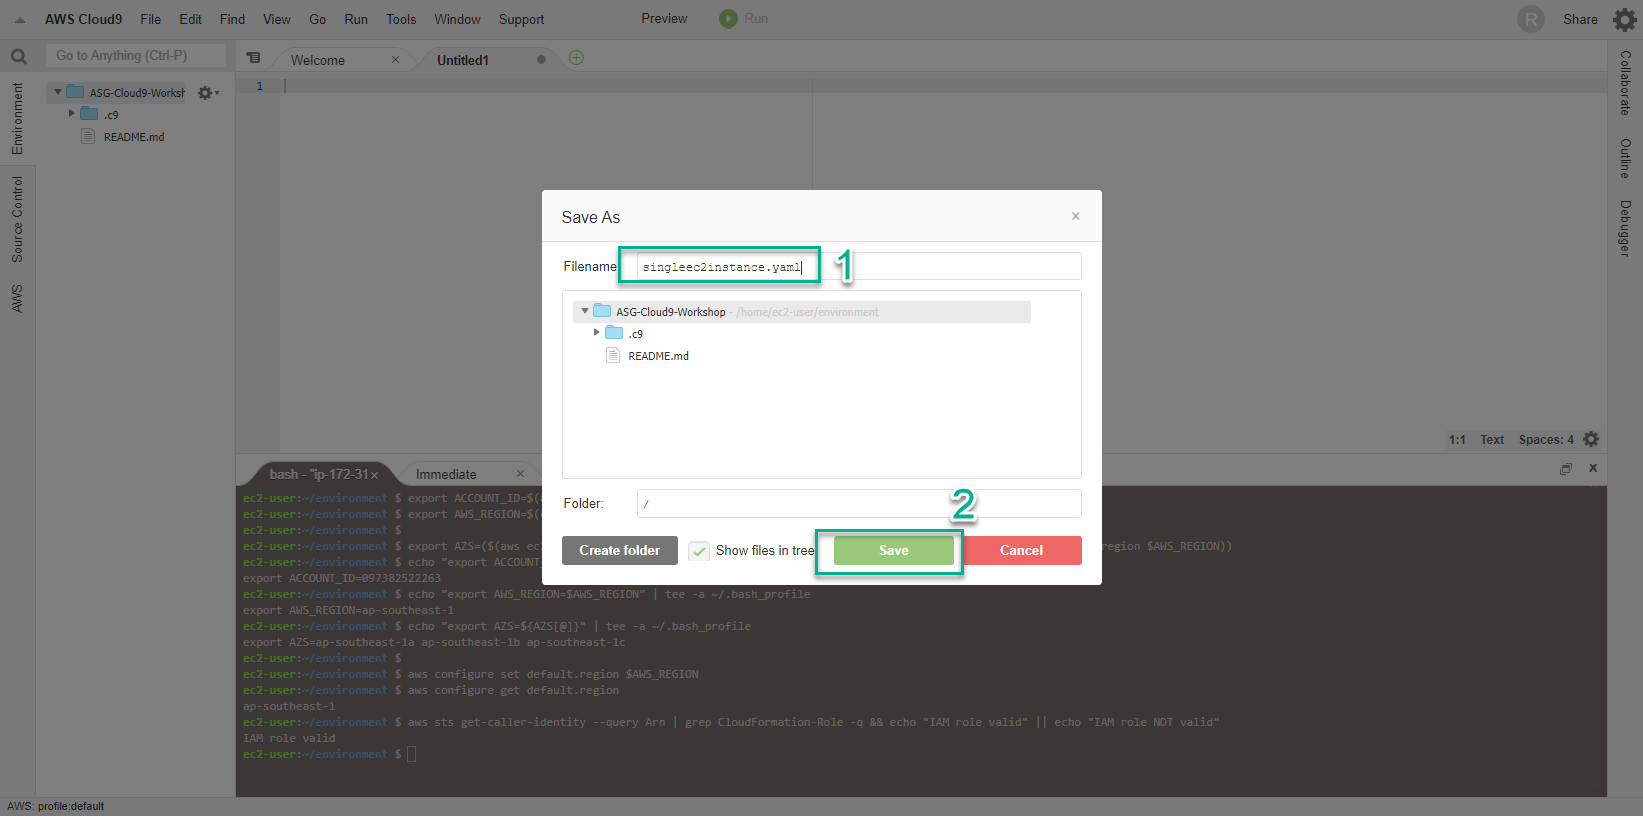
Đặt file name singleec2instance.yaml
- Thực hiện dán nội dung dưới đây vào cửa sổ New File
AWSTemplateFormatVersion: "2010-09-09"
Description: "Deploy Single EC2 Linux Instance as part of MGT312 Workshop"
Parameters:
  EC2InstanceType:
    AllowedValues:
      - t3.nano
      - t3.micro
      - t3.small
      - t3.medium
      - t3.large
      - t3.xlarge
      - t3.2xlarge
      - m5.large
      - m5.xlarge
      - m5.2xlarge
    Default: t3.small
    Description: Amazon EC2 instance type
    Type: String
  LatestAmiId:
    Type: 'AWS::SSM::Parameter::Value<AWS::EC2::Image::Id>'
    Default: "/aws/service/ami-amazon-linux-latest/amzn2-ami-hvm-x86_64-gp2"
  SubnetID:
    Description: ID of a Subnet.
    Type: AWS::EC2::Subnet::Id
  SourceLocation:
    Description : The CIDR IP address range that can be used to RDP to the EC2 instances
    Type: String
    MinLength: 9
    MaxLength: 18
    Default: 0.0.0.0/0
    AllowedPattern: "(\\d{1,3})\\.(\\d{1,3})\\.(\\d{1,3})\\.(\\d{1,3})/(\\d{1,2})"
    ConstraintDescription: must be a valid IP CIDR range of the form x.x.x.x/x.
  VPCID:
    Description: ID of the target VPC (e.g., vpc-0343606e).
    Type: AWS::EC2::VPC::Id
Resource: Security Group
Và chúng ta đã thiết lập xong các tham số để có thể tái sử dụng CloudFormaton ở những lần sau. Giờ chúng ta sẽ đi xác định những thành phần bắt buộc, đó là Tài nguyên.
Cần lưu ý rằng việc sử dụng thành thạo tài liệu AWS Resource and Property Types Reference đóng vai trò rất quan trọng trong việc tạo ra CloudFormation template.
Tài nguyên đầu tiên chúng ta thêm vào là Security Group với quy tắc cho phép lưu lượng truy cập trên cổng 80. Ở đây chúng ta sử dụng kỹ thuật *Tham chiếu Hàm Nội tại *(Intrinsic Function Ref) để trả về giá trị của tham số VPCID.
AWS CloudFormation cung cấp một số chức năng tích hợp giúp bạn quản lý các Stack và sử dụng các hàm nội tại trong template để gán giá trị cho các thuộc tính chỉ khả dụng tại thời điểm runtime.
Thực hiện sao chép nội dung sau đây rồi dán nối tiếp vào đoạn code trong cửa sổ New File ở bước trên:
Resources:
  EC2InstanceSG:
    Type: AWS::EC2::SecurityGroup
    Properties:
      GroupDescription: EC2 Instance Security Group
      VpcId: !Ref 'VPCID'
      SecurityGroupIngress:
      - IpProtocol: tcp
        FromPort: 80
        ToPort: 80
        CidrIp: !Ref SourceLocation
Resource: Instance Role
Ở bước này chúng ta sẽ đi tạo Role dùng để gán cho EC2 Instance, cho phép nó gửi thông tin giám sát và giao tiếp với AWS Systems Manager Service (SSM). Cùng với đó một InstanceProfile cũng được tạo ra và tham chiếu tới Instance Role.
Đoạn code cũng sử dụng kỹ thuật Hàm Phụ Nội tại (Intrinsic Function Sub) để thay thế các giá trị trong một chuỗi với Tham số Giả (Pseudo parameters) như AWS::Region và AWS::Partition.
Tham số Giả là những tham số được xác định trước. Chúng ta sẽ không khai báo chúng trong template và sử dụng chúng giống như một tham số thông thường.
Thực hiện sao chép nội dung sau đây rồi dán nối tiếp vào đoạn code trong cửa sổ New File ở bước trên:
  SSMInstanceRole:
    Type : AWS::IAM::Role
    Properties:
      Policies:
        - PolicyDocument:
            Version: '2012-10-17'
            Statement:
              - Action:
                  - s3:GetObject
                Resource:
                  - !Sub 'arn:aws:s3:::aws-ssm-${AWS::Region}/*'
                  - !Sub 'arn:aws:s3:::aws-windows-downloads-${AWS::Region}/*'
                  - !Sub 'arn:aws:s3:::amazon-ssm-${AWS::Region}/*'
                  - !Sub 'arn:aws:s3:::amazon-ssm-packages-${AWS::Region}/*'
                  - !Sub 'arn:aws:s3:::${AWS::Region}-birdwatcher-prod/*'
                  - !Sub 'arn:aws:s3:::patch-baseline-snapshot-${AWS::Region}/*'
                Effect: Allow
          PolicyName: ssm-custom-s3-policy
      Path: /
      ManagedPolicyArns:
        - !Sub 'arn:${AWS::Partition}:iam::aws:policy/AmazonSSMManagedInstanceCore'
        - !Sub 'arn:${AWS::Partition}:iam::aws:policy/CloudWatchAgentServerPolicy'
      AssumeRolePolicyDocument:
        Version: "2012-10-17"
        Statement:
        - Effect: "Allow"
          Principal:
            Service:
            - "ec2.amazonaws.com"
            - "ssm.amazonaws.com"
          Action: "sts:AssumeRole"
  SSMInstanceProfile:
    Type: "AWS::IAM::InstanceProfile"
    Properties:
      Roles:
      - !Ref SSMInstanceRole
Resource: EC2 Instance
Tiếp tục xây dựng template với việc xác định EC2 Instance.
Ở bước này tất cả các thành phần bao gồm các tài nguyên và thông số đã cấu hình trước đó sẽ được tập hợp lại với nhau. Chúng ta sử dụng kỹ thuật Tham chiếu Hàm Nội tại !Ref để gán hoặc tạo ra các tài nguyên và giá trị sinh ra tại thời điểm runtime. Việc sử dụng !Ref cũng ảnh hưởng đến thứ tự tài nguyên được tạo bởi CloudFormation.
Thực hiện sao chép nội dung sau đây rồi dán nối tiếp vào đoạn code trong cửa sổ New File ở bước trên:
  EC2Instance:
    Type: "AWS::EC2::Instance"
    Properties:
      ImageId: !Ref LatestAmiId
      InstanceType: !Ref EC2InstanceType
      IamInstanceProfile: !Ref SSMInstanceProfile
      NetworkInterfaces:
        - DeleteOnTermination: true
          DeviceIndex: '0'
          SubnetId: !Ref 'Subnet'
          GroupSet:
            - !Ref EC2InstanceSG
      Tags:
      - Key: "Name"
        Value: "MGMT312-EC2"
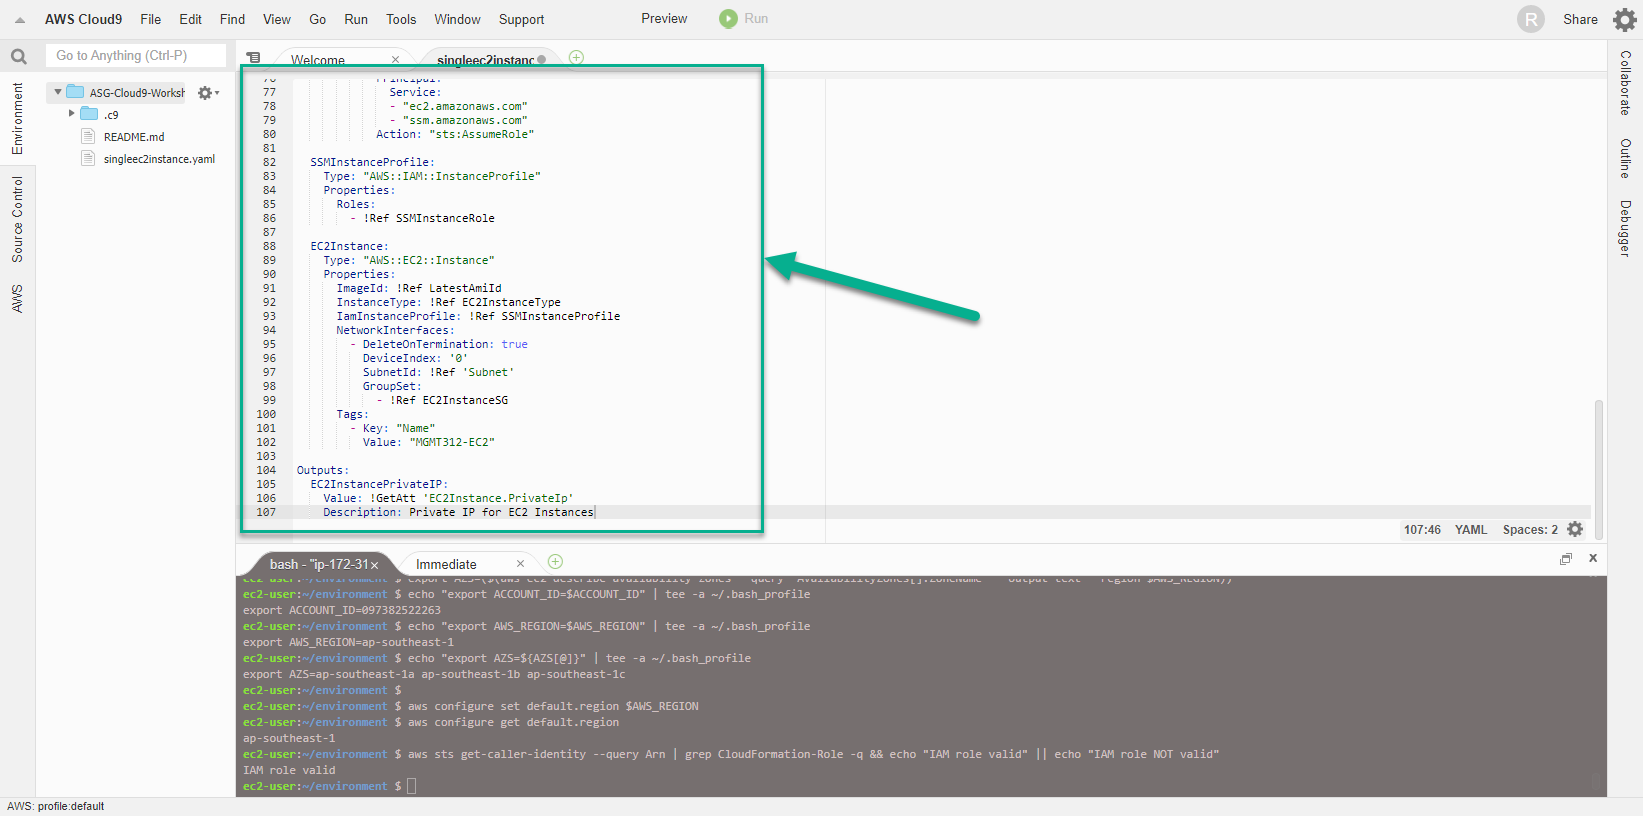
Outputs
Cuối cùng là phần nội dung Outputs với kết quả trả về là địa chỉ Private IP của Instance - một giá trị thuộc tính của Resource - thông qua sử dụng Hàm Nội tại GettAtt.
Tham chiếu tài liệu AWS Resource and Property Types Reference để tìm kiếm thêm thông tin có thể lấy được nhờ hàm GetAtt hoặc !Ref. Thực hiện sao chép nội dung sau đây rồi dán nối tiếp vào đoạn code trong cửa sổ New File ở bước trên:
Outputs:
  EC2InstancePrivateIP:
    Value: !GetAtt 'EC2Instance.PrivateIp'
    Description: Private IP for EC2 Instances
- Kiểm tra lại template lần cuối tại đường dẫn /home/ec2-user-environment
AWSTemplateFormatVersion: "2010-09-09"
Description: "Deploy Single EC2 Linux Instance"
Parameters:
  EC2InstanceType:
    AllowedValues:
      - t3.nano
      - t3.micro
      - t3.small
      - t3.medium
      - t3.large
      - t3.xlarge
      - t3.2xlarge
      - m5.large
      - m5.xlarge
      - m5.2xlarge
    Default: t3.small
    Description: Amazon EC2 instance type
    Type: String
  LatestAmiId:
    Type: 'AWS::SSM::Parameter::Value<AWS::EC2::Image::Id>'
    Default: "/aws/service/ami-amazon-linux-latest/amzn2-ami-hvm-x86_64-gp2"
  SubnetID:
    Description: ID of a Subnet.
    Type: AWS::EC2::Subnet::Id
  SourceLocation:
    Description : The CIDR IP address range that can be used to RDP to the EC2 instances
    Type: String
    MinLength: 9
    MaxLength: 18
    Default: 0.0.0.0/0
    AllowedPattern: "(\\d{1,3})\\.(\\d{1,3})\\.(\\d{1,3})\\.(\\d{1,3})/(\\d{1,2})"
    ConstraintDescription: must be a valid IP CIDR range of the form x.x.x.x/x.
  VPCID:
    Description: ID of the target VPC (e.g., vpc-0343606e).
    Type: AWS::EC2::VPC::Id

Resources:

  EC2InstanceSG:
    Type: AWS::EC2::SecurityGroup
    Properties:
      GroupDescription: EC2 Instance Security Group
      VpcId: !Ref 'VPCID'
      SecurityGroupIngress:
        - IpProtocol: tcp
          FromPort: 80
          ToPort: 80
          CidrIp: !Ref SourceLocation

  SSMInstanceRole:
    Type : AWS::IAM::Role
    Properties:
      Policies:
        - PolicyDocument:
            Version: '2012-10-17'
            Statement:
              - Action:
                  - s3:GetObject
                Resource:
                  - !Sub 'arn:aws:s3:::aws-ssm-${AWS::Region}/*'
                  - !Sub 'arn:aws:s3:::aws-windows-downloads-${AWS::Region}/*'
                  - !Sub 'arn:aws:s3:::amazon-ssm-${AWS::Region}/*'
                  - !Sub 'arn:aws:s3:::amazon-ssm-packages-${AWS::Region}/*'
                  - !Sub 'arn:aws:s3:::${AWS::Region}-birdwatcher-prod/*'
                  - !Sub 'arn:aws:s3:::patch-baseline-snapshot-${AWS::Region}/*'
                Effect: Allow
          PolicyName: ssm-custom-s3-policy
      Path: /
      ManagedPolicyArns:
        - !Sub 'arn:${AWS::Partition}:iam::aws:policy/AmazonSSMManagedInstanceCore'
        - !Sub 'arn:${AWS::Partition}:iam::aws:policy/CloudWatchAgentServerPolicy'
      AssumeRolePolicyDocument:
        Version: "2012-10-17"
        Statement:
          - Effect: "Allow"
            Principal:
              Service:
              - "ec2.amazonaws.com"
              - "ssm.amazonaws.com"
            Action: "sts:AssumeRole"

  SSMInstanceProfile:
    Type: "AWS::IAM::InstanceProfile"
    Properties:
      Roles:
        - !Ref SSMInstanceRole

  EC2Instance:
    Type: "AWS::EC2::Instance"
    Properties:
      ImageId: !Ref LatestAmiId
      InstanceType: !Ref EC2InstanceType
      IamInstanceProfile: !Ref SSMInstanceProfile
      NetworkInterfaces:
        - DeleteOnTermination: true
          DeviceIndex: '0'
          SubnetId: !Ref 'Subnet'
          GroupSet:
            - !Ref EC2InstanceSG
      Tags:
        - Key: "Name"
          Value: "MGMT312-EC2"

Outputs:
  EC2InstancePrivateIP:
    Value: !GetAtt 'EC2Instance.PrivateIp'
    Description: Private IP for EC2 Instances
- Để giảm bớt gánh nặng trong việc kiểm tra sai sót của mã lệnh táo template thì ta có thể sử dụng một số công cụ tự động kiểm tra để validate cú pháp dùng trong template. Với CloudFormation workshop lần này, chúng ta sử dụng cfn-lint
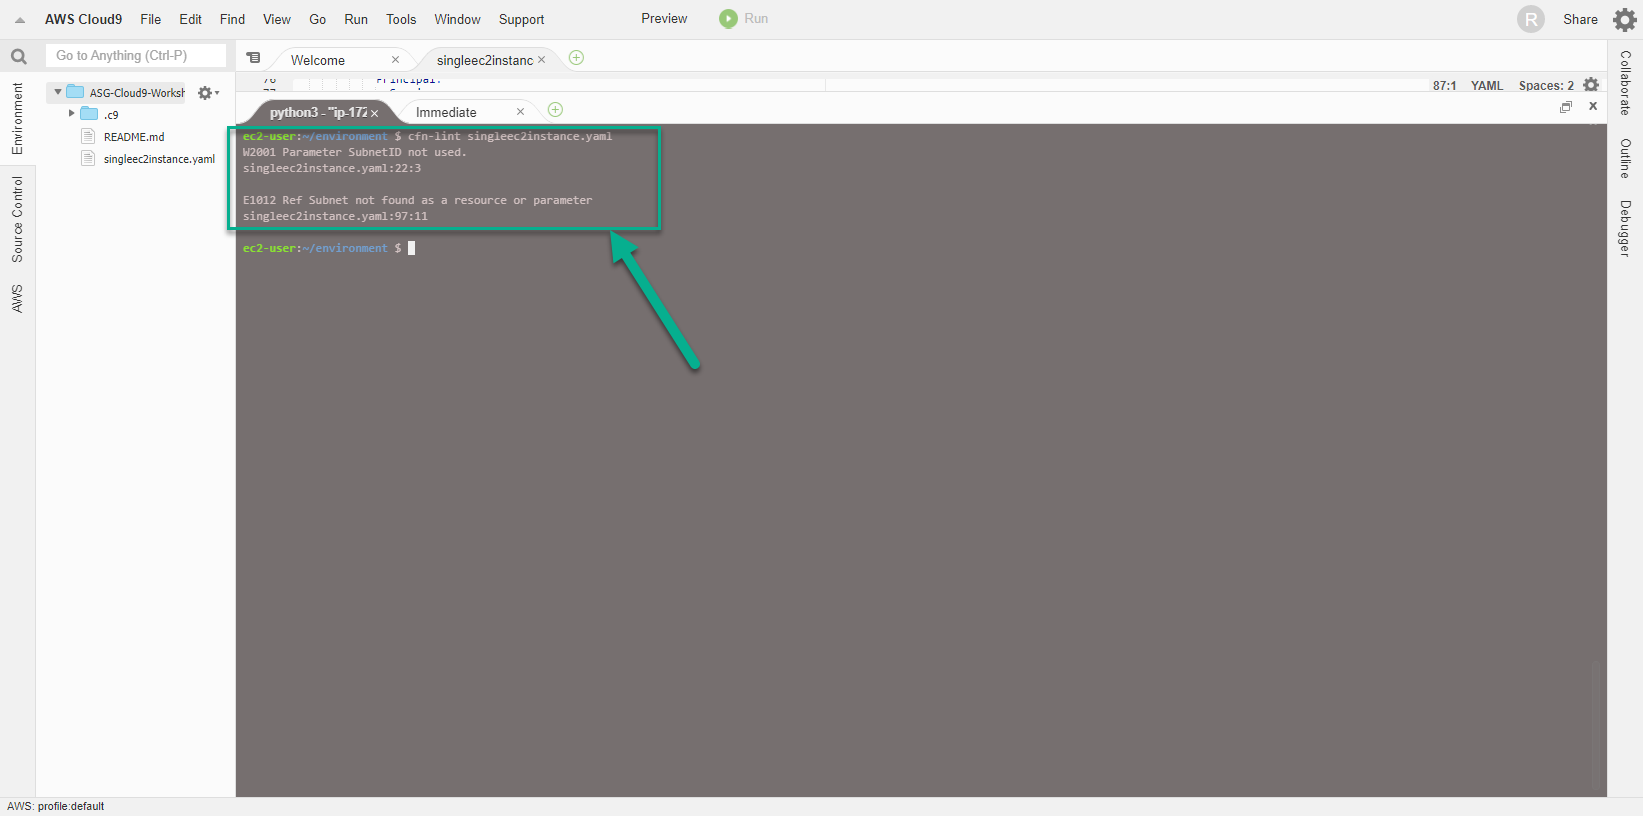
- Thực hiện chạy lệnh sau đây:
cfn-lint singleec2instance.yaml
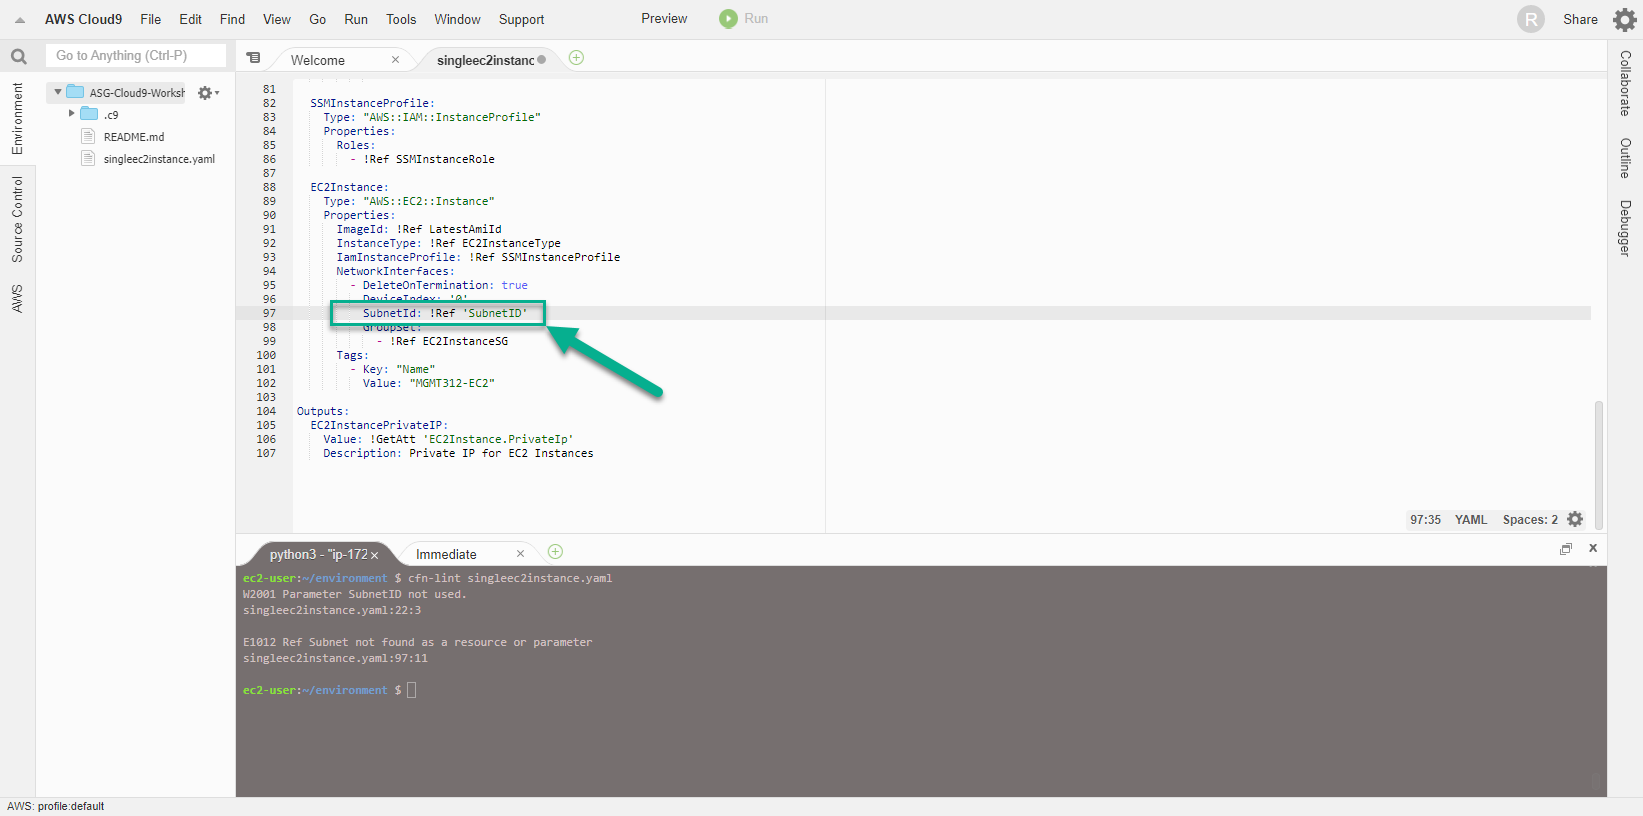
- Dễ dàng thấy, đã có lỗi xảy ra với CloudFormation template, cụ thể là dòng 97, chúng ta đã sử dụng sai giá trị Subnet. Công cụ cfn-lint thực sự đã làm rất tốt vai trò của mình, phát hiện lỗi sai về cú pháp và thông tin trong template.
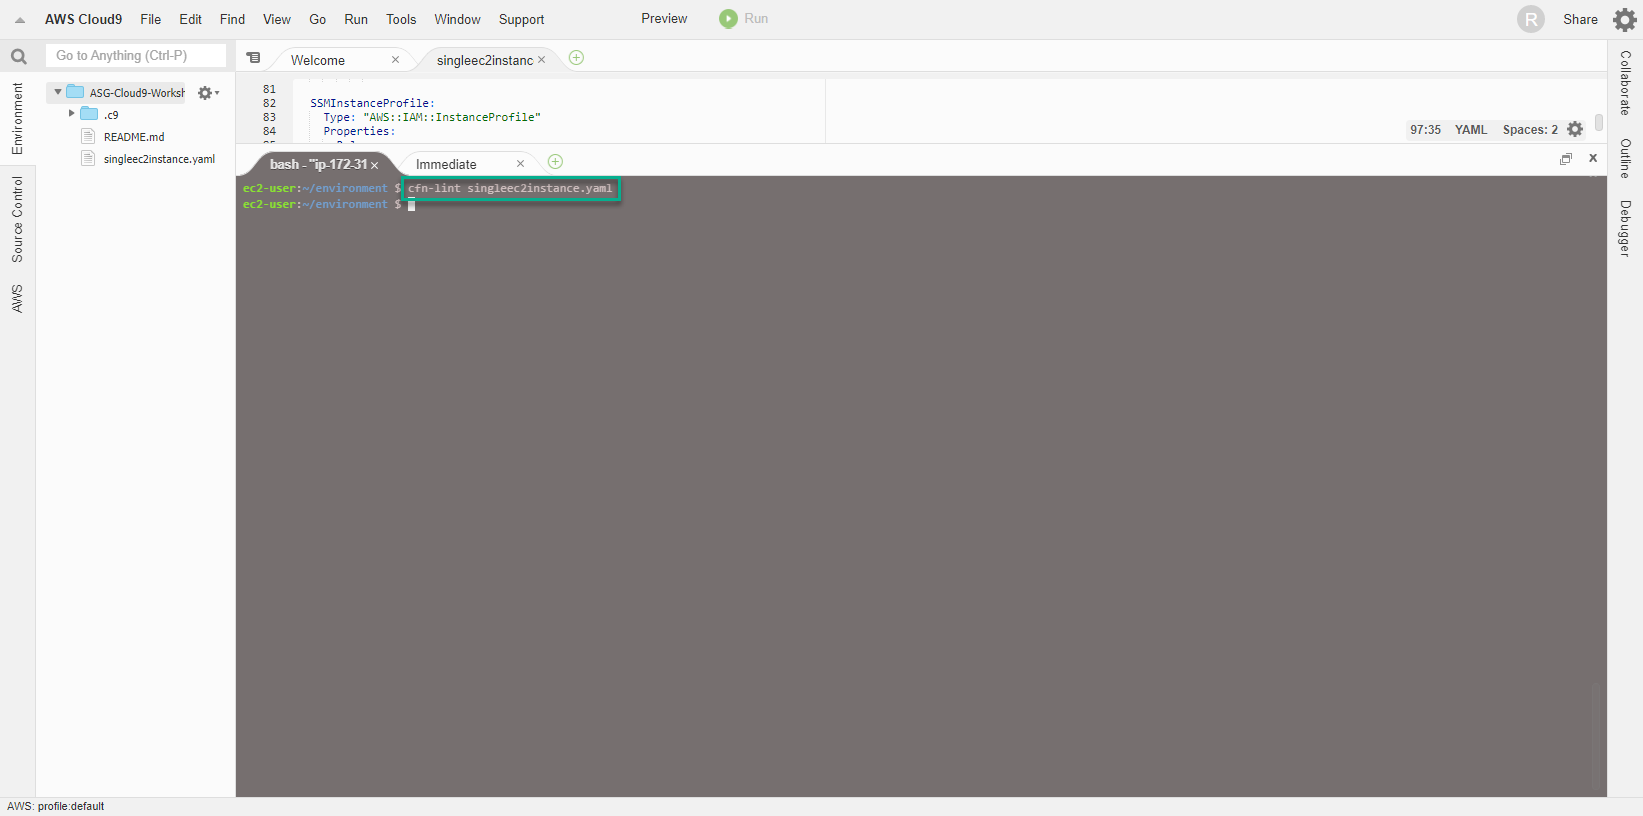
- Thực hiện sửa lại template bằng cách thay giá trị Subnet thành SubnetID, rồi chạy lại lênh cfn-lint.
- Kết quả lệnh chạy thành công và không có lỗi xảy ra, ngoài cảnh báo về python version. Chúng ta có thể ignore chúng bởi đơn giản chúng ta chỉ đang thực hiện một workshop.
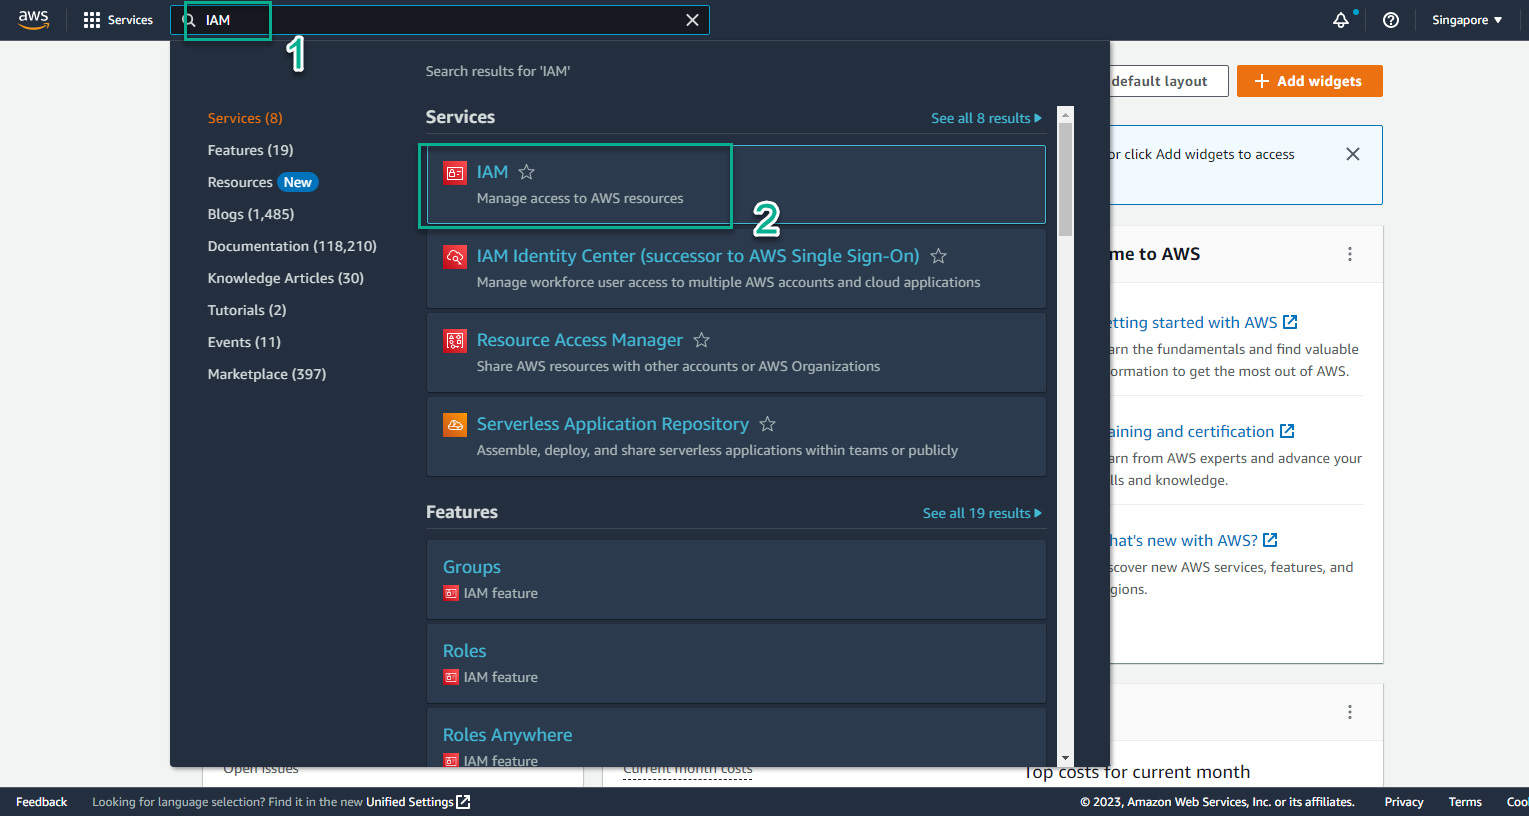
- Tạo CloudFormation Stack Để tạo được CloudFormation Stack, Cloud9 server bắt buộc phải quyền truy cập và sử dụng dịch vụ EC2 và IAM, do vậy cần thực hiện bổ sung thêm policy cho IAM Role đang được attach với Cloud9 server. Ví dụ bổ sung thêm các policy cần thiết như AmazonEC2FullAccess, IAMFullAccess
- Truy cập vào trang AWS Management Console
- Tìm IAM
- Chọn IAM
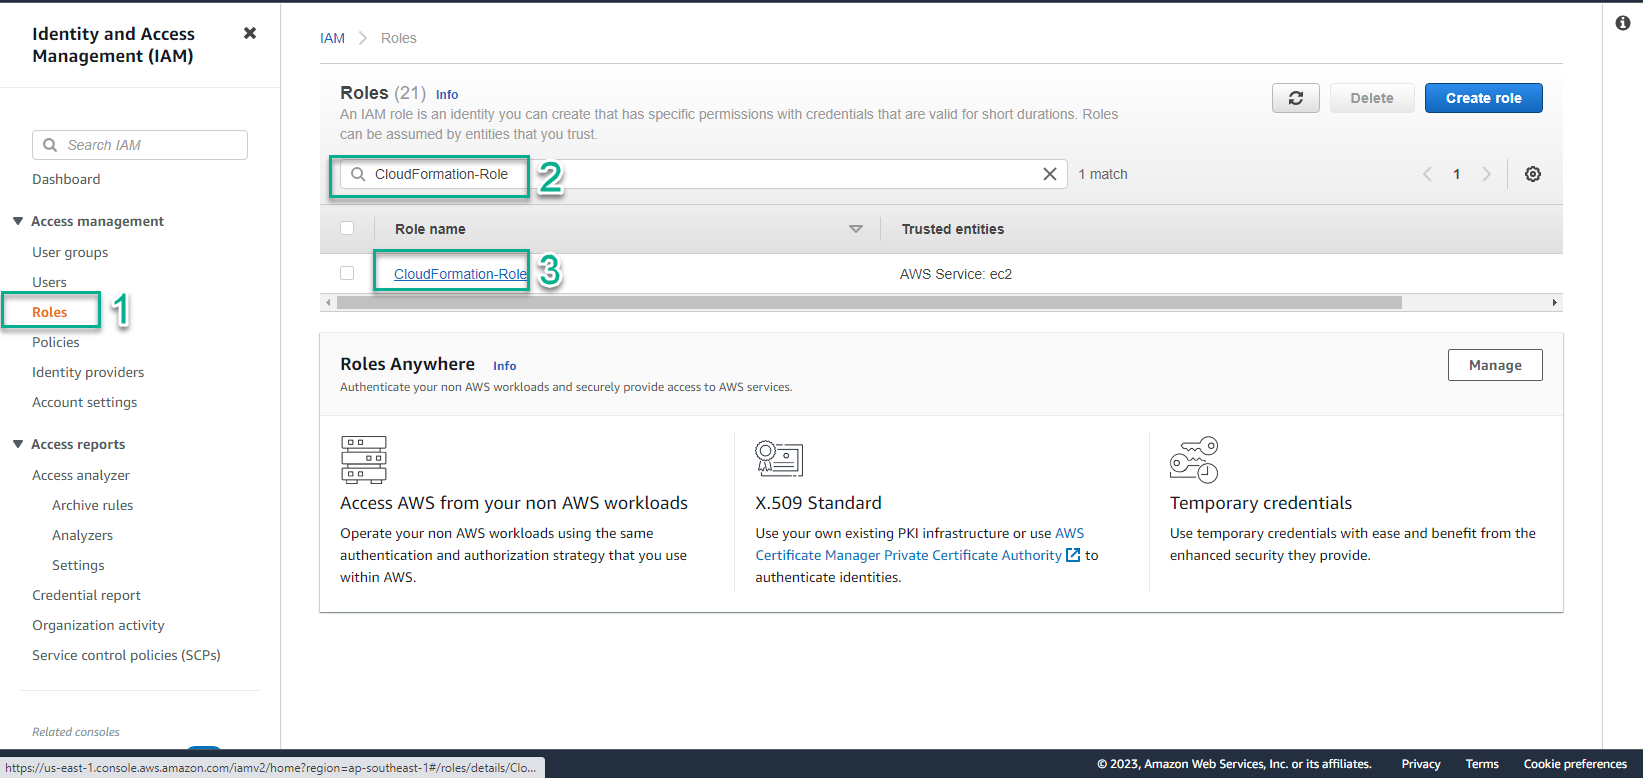
- Trong giao diện IAM
- Chọn Roles
- Tìm kiếm CloudFormation-Role
- Chọn Role name CloudFormation-Role
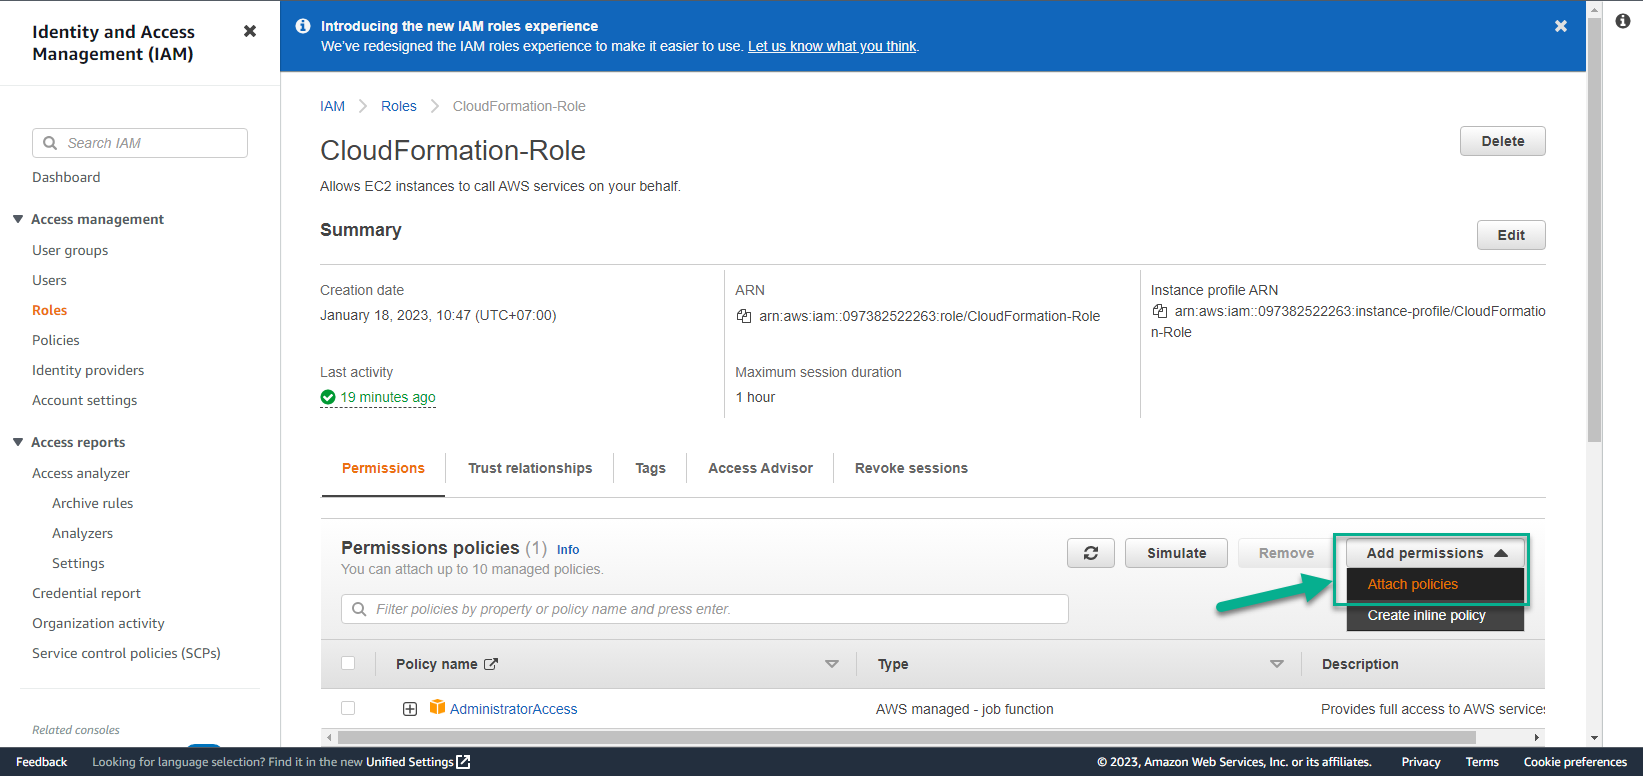
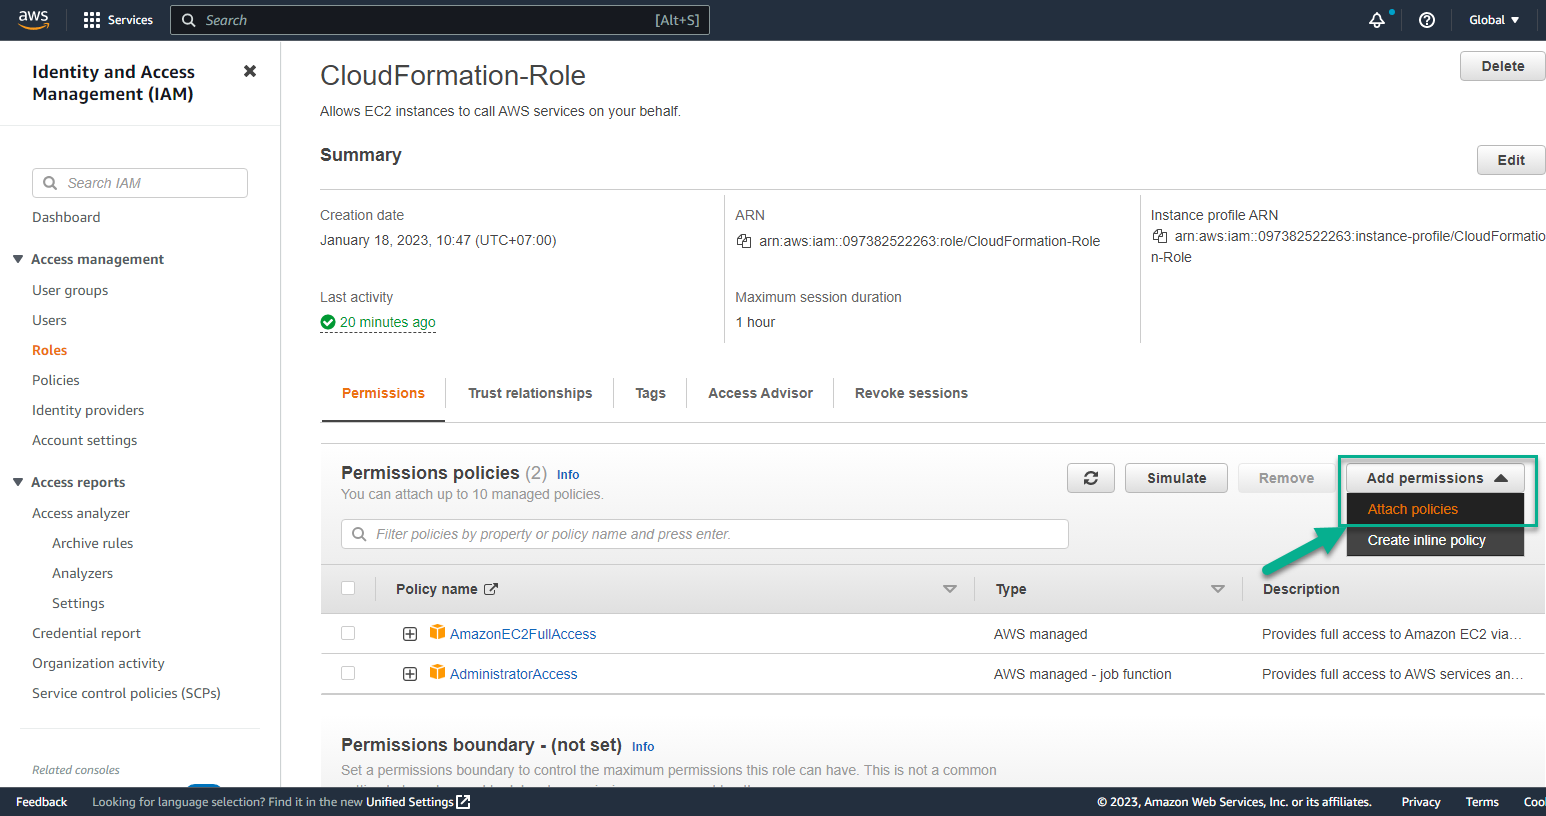
- Trong giao diện CloudFormation-Role
- Chọn Add permissions
- Chọn Attach policies
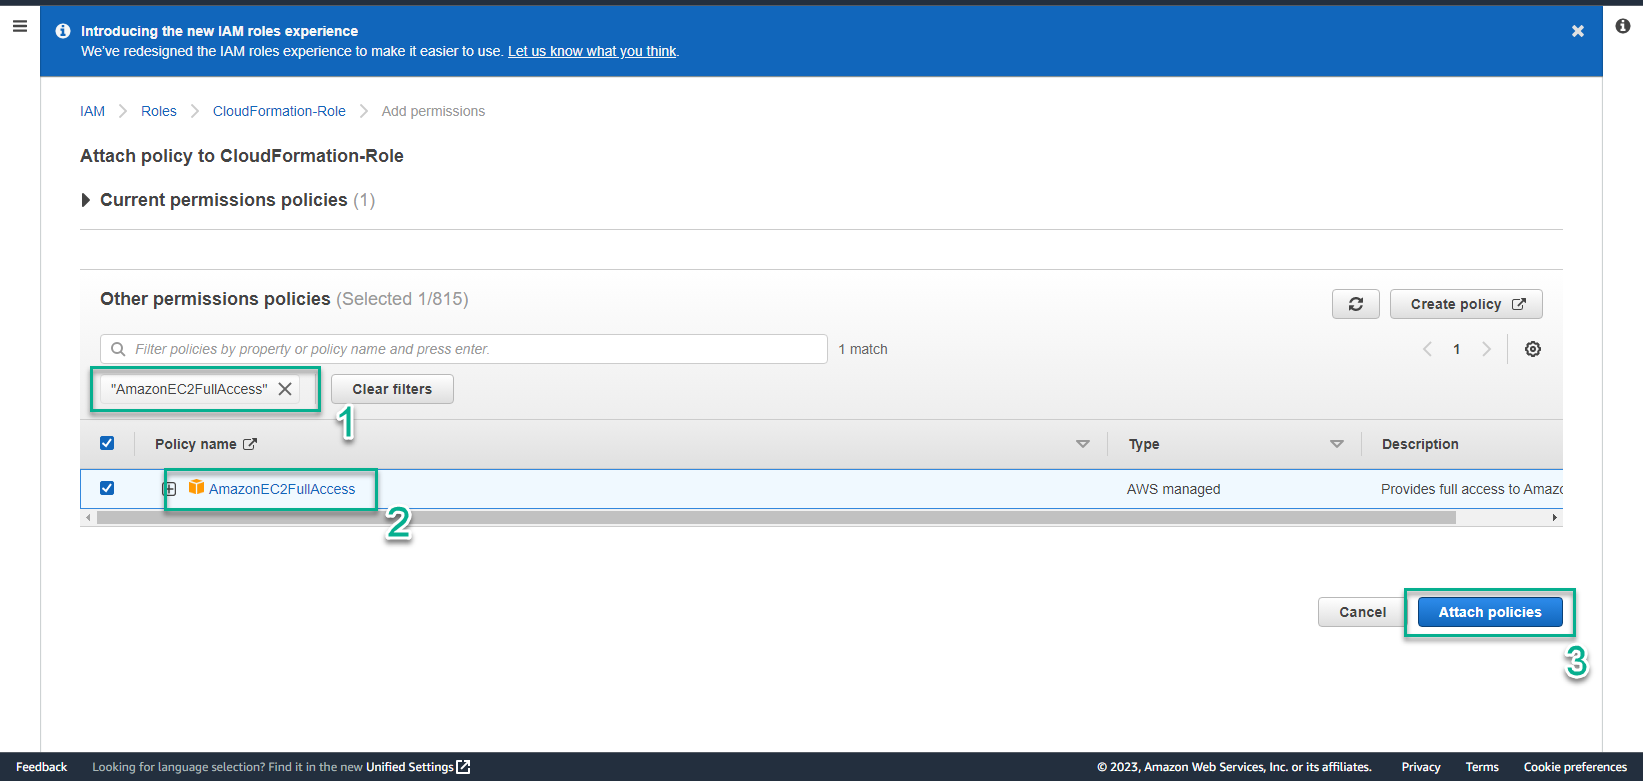
- Trong bước Attach policy to CloudFormation-Role
- Tìm AmazonEC2FullAccess
- Chọn AmazonEC2FullAccess
- Chọn Attach policies
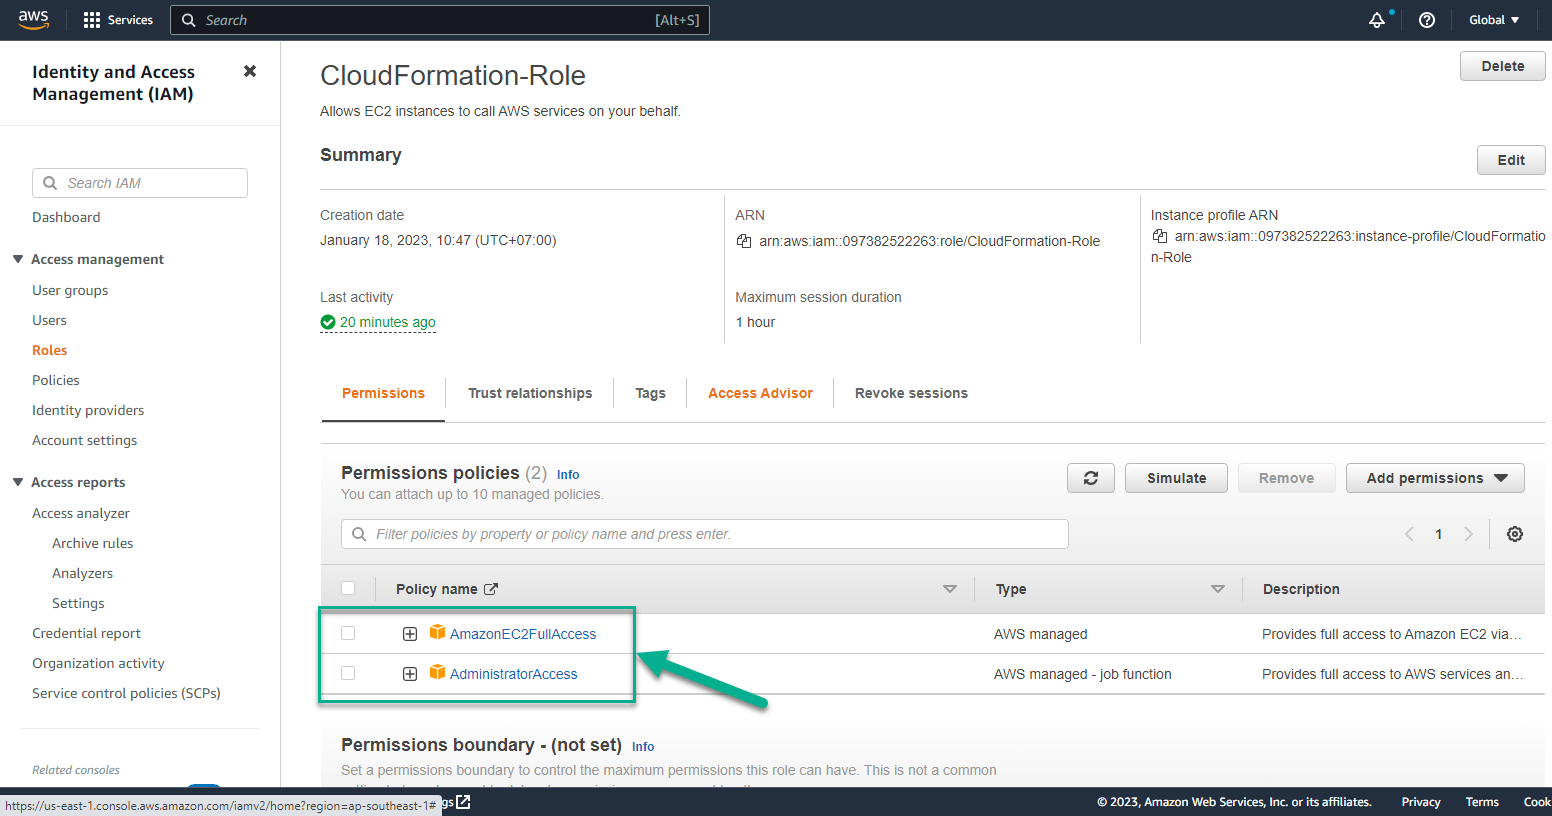
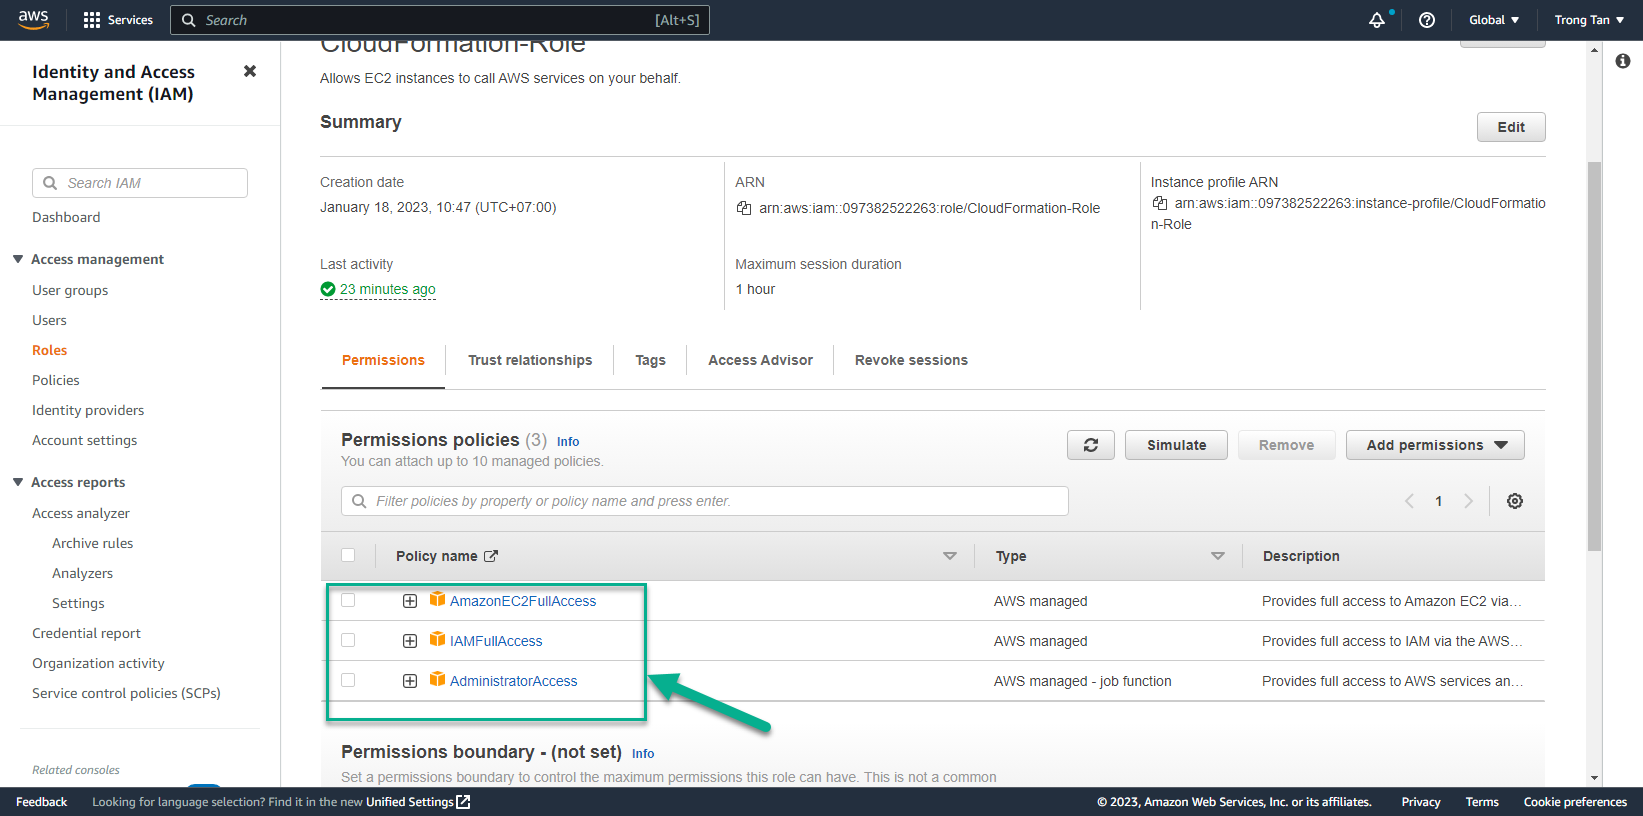
- Giao diện Attach policies thành công
- Tiếp tục thực hiện Attach policies
- Chọn Add permissions
- Chọn Attach policies
- Trong bước Attach policy to CloudFormation-Role
- Tìm IAMFullAccess
- Chọn IAMFullAccess
- Chọn Attach policies

- Giao diện sau khi Attach policies thành công
- Để chuẩn bị tạo CloudFormation Template chúng ta cần chuẩn bị sẵn VPC và Public subnet
- Truy cập vào AWS Management Console
- Tìm VPC
- Chọn VPC
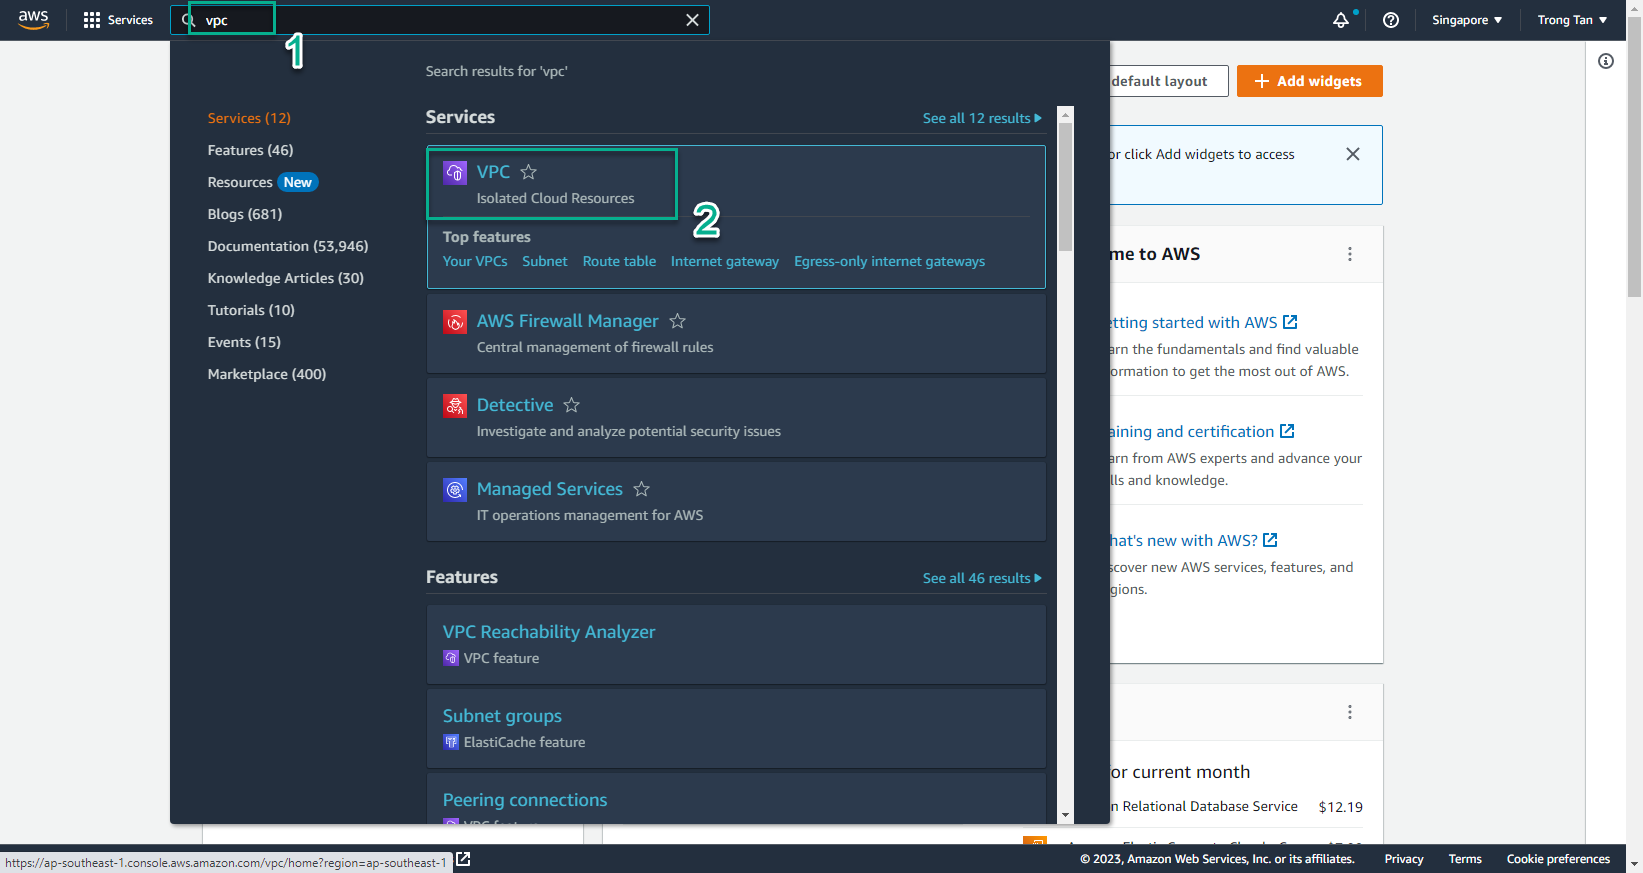
- Trong giao diện VPC
- Chọn Your VPC
- Chọn VPC mà bạn muốn sử dụng
- Sao chép VPC ID để sử dụng tạo CloudFormation Template
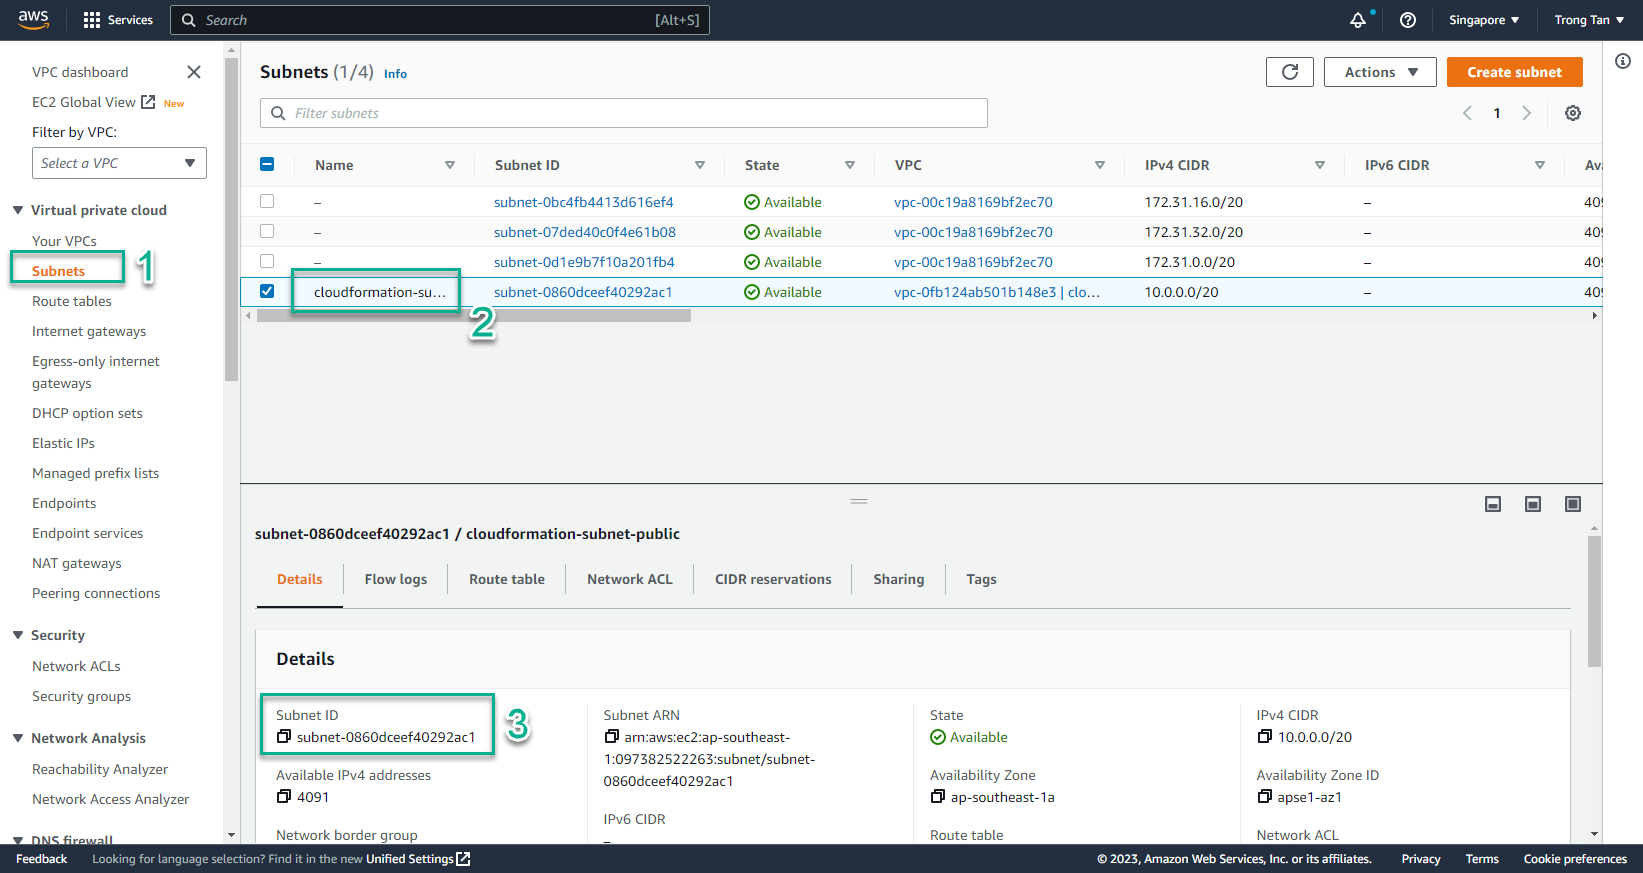
- Tương tự subnet cũng thực hiện lặp lại

- Trong giao diện VPC
- Chọn Subnets
- Chọn subnet bạn muốn sử dụng (Public Subnet)
- Sao chép Subnet ID
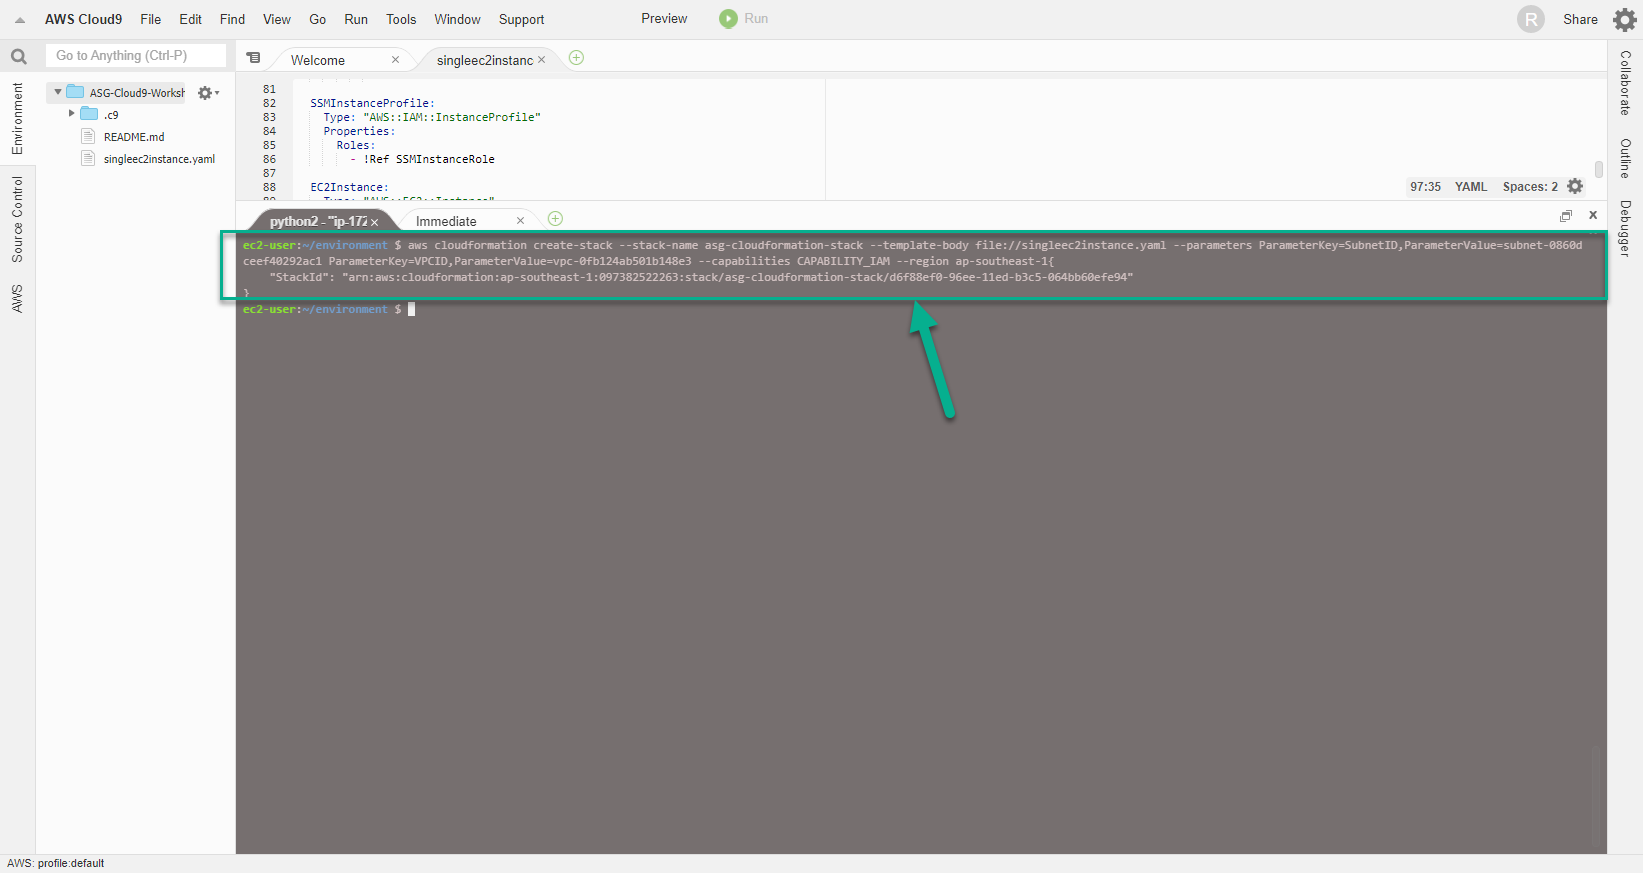
- Sau khi Cloud9 server đã có đủ quyền thực hiện việc tạo các Resource với CloudFormation, trên cửa sổ terminal, chạy lệnh:
- Bạn thay thế VPC ID và Subnet ID vào lệnh.
- ParameterValue của ParameterKey=SubnetID thay bằng Subnet ID của ở bước 17
- ParameterValue của ParameterKey=VPCID thay bằng VPCID của ở bước 16
aws cloudformation create-stack --stack-name asg-cloudformation-stack --template-body file://singleec2instance.yaml --parameters ParameterKey=SubnetID,ParameterValue=subnet-04c111ad3987c5350 ParameterKey=VPCID,ParameterValue=vpc-0e3f81c05d3920198 --capabilities CAPABILITY_IAM --region us-east-1
- Tiến hành kiểm tra quá trình khởi tạo CloudFormation Template
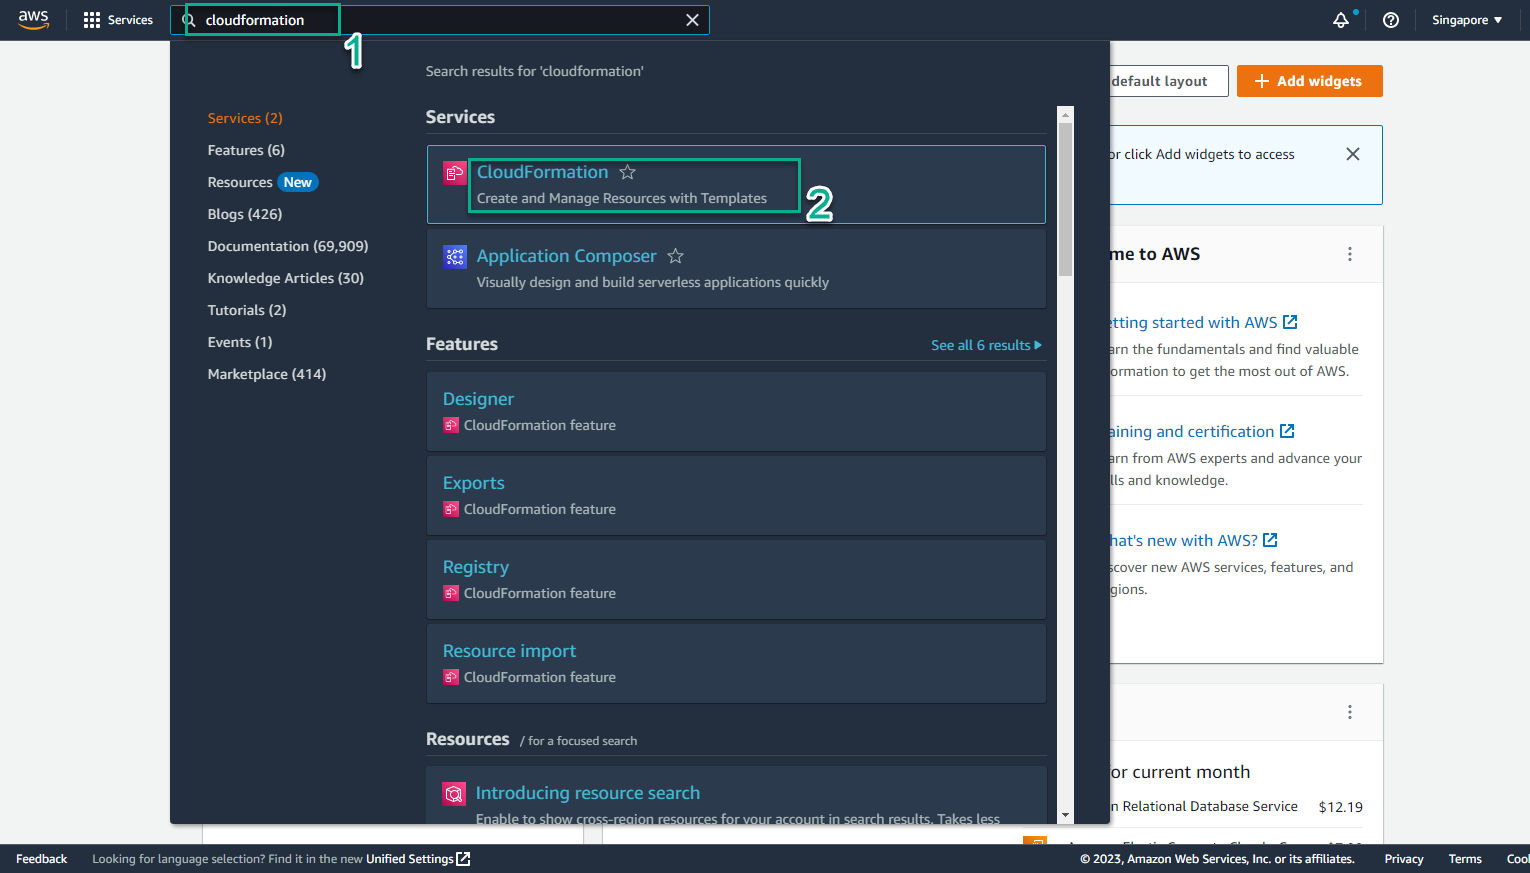
- Truy cập AWS Management Console
- Tìm CloudFormation
- Chọn CloudFormation
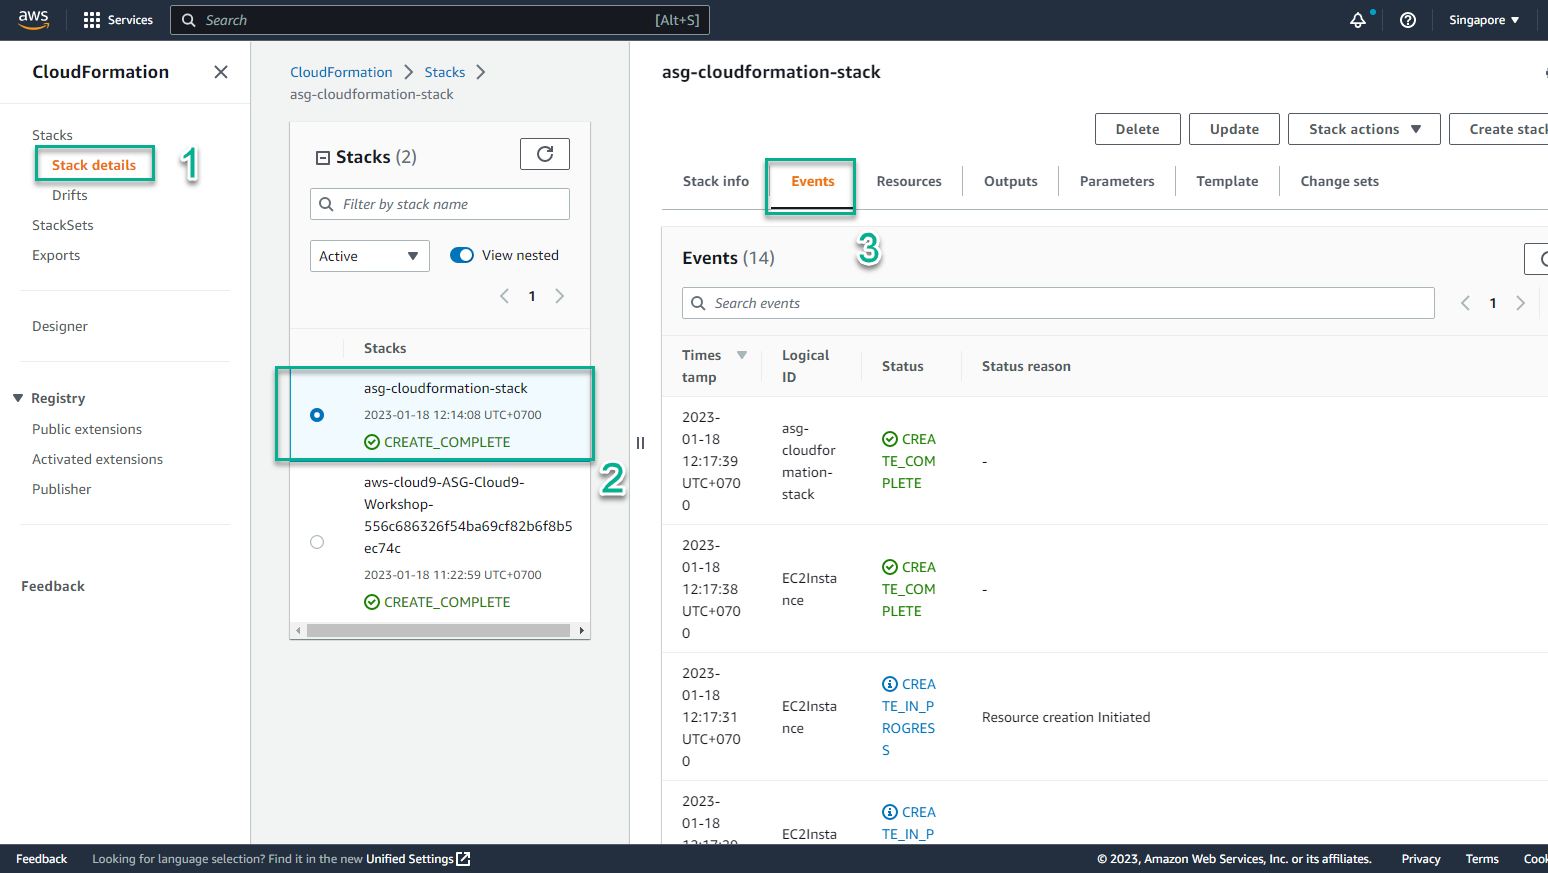
- Trong giao diện CloudFormation
- Chọn Stack details
- Chọn Stack có tên asg-cloudformation-stack
- Chọn Events
- Xem các event khởi tạo
- Khi Status chuyển sang CREATE_COMPLETE là khởi tạo thành công
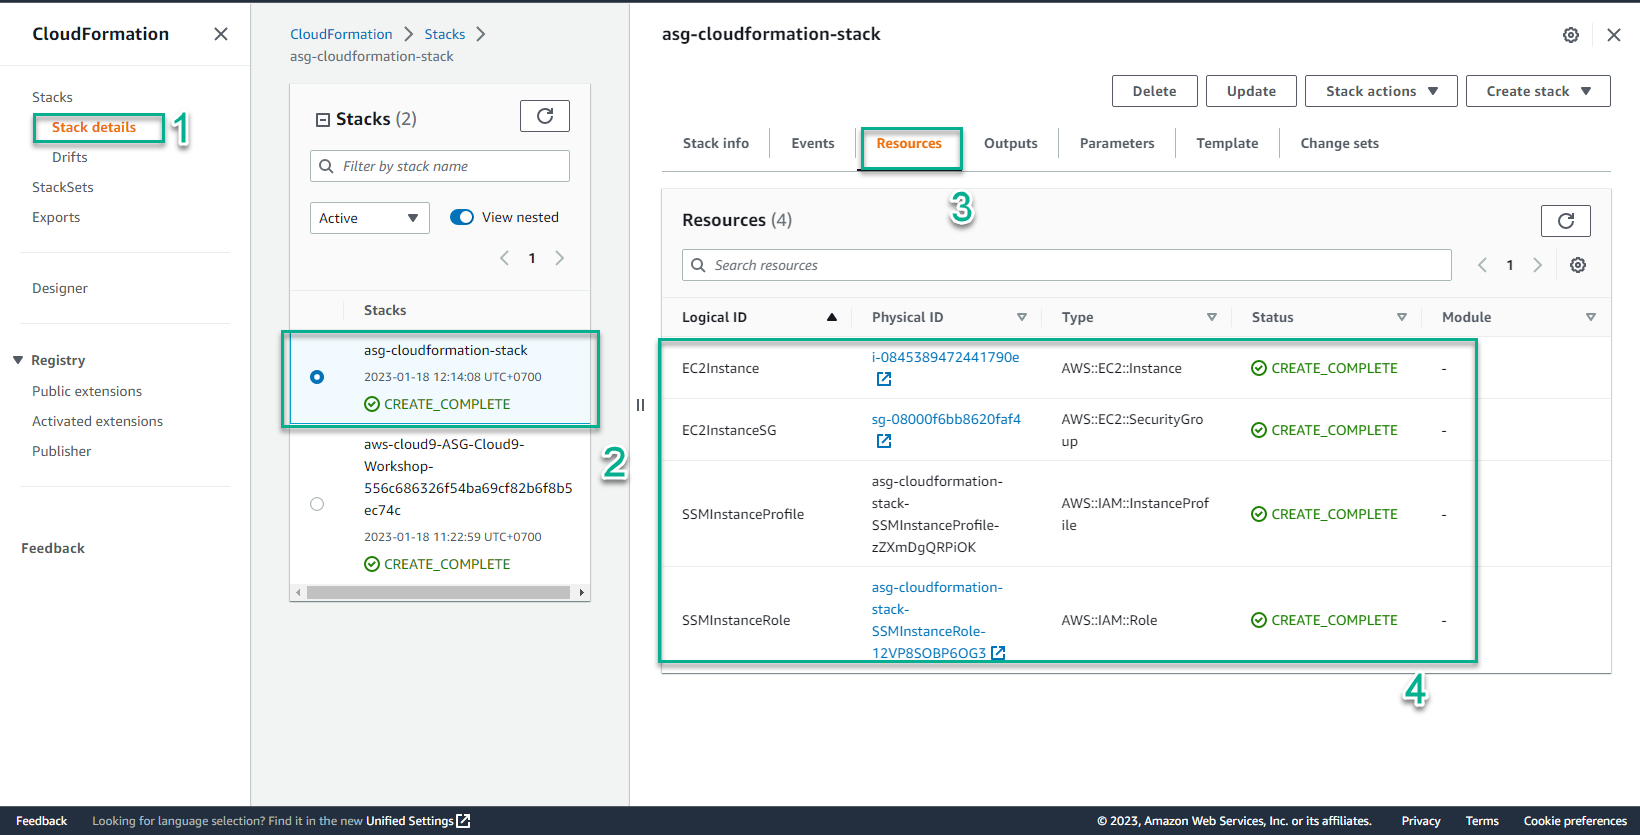
- Trong giao diện CloudFormation
- Chọn Stack details
- Chọn stack vừa tạo
- Chọn Resource
- Xem thông tin các Resource khởi tạo thành công
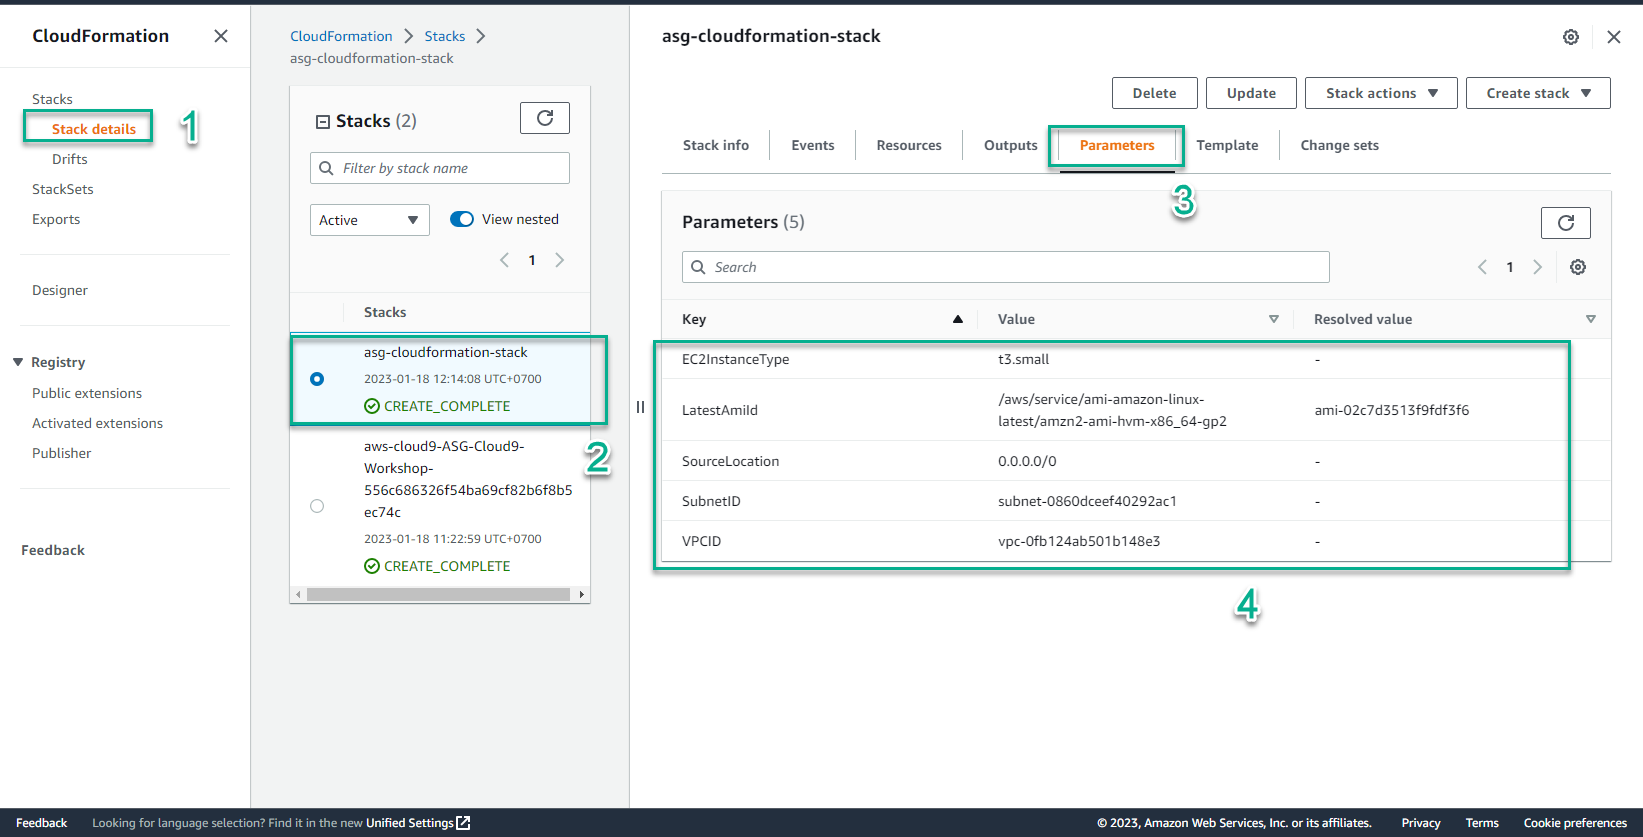
- Trong giao diện CloudFormation
- Chọn Stack details
- Chọn stack vừa tạo
- Chọn Parameters
- Xem thông tin các Key-Value khởi tạo
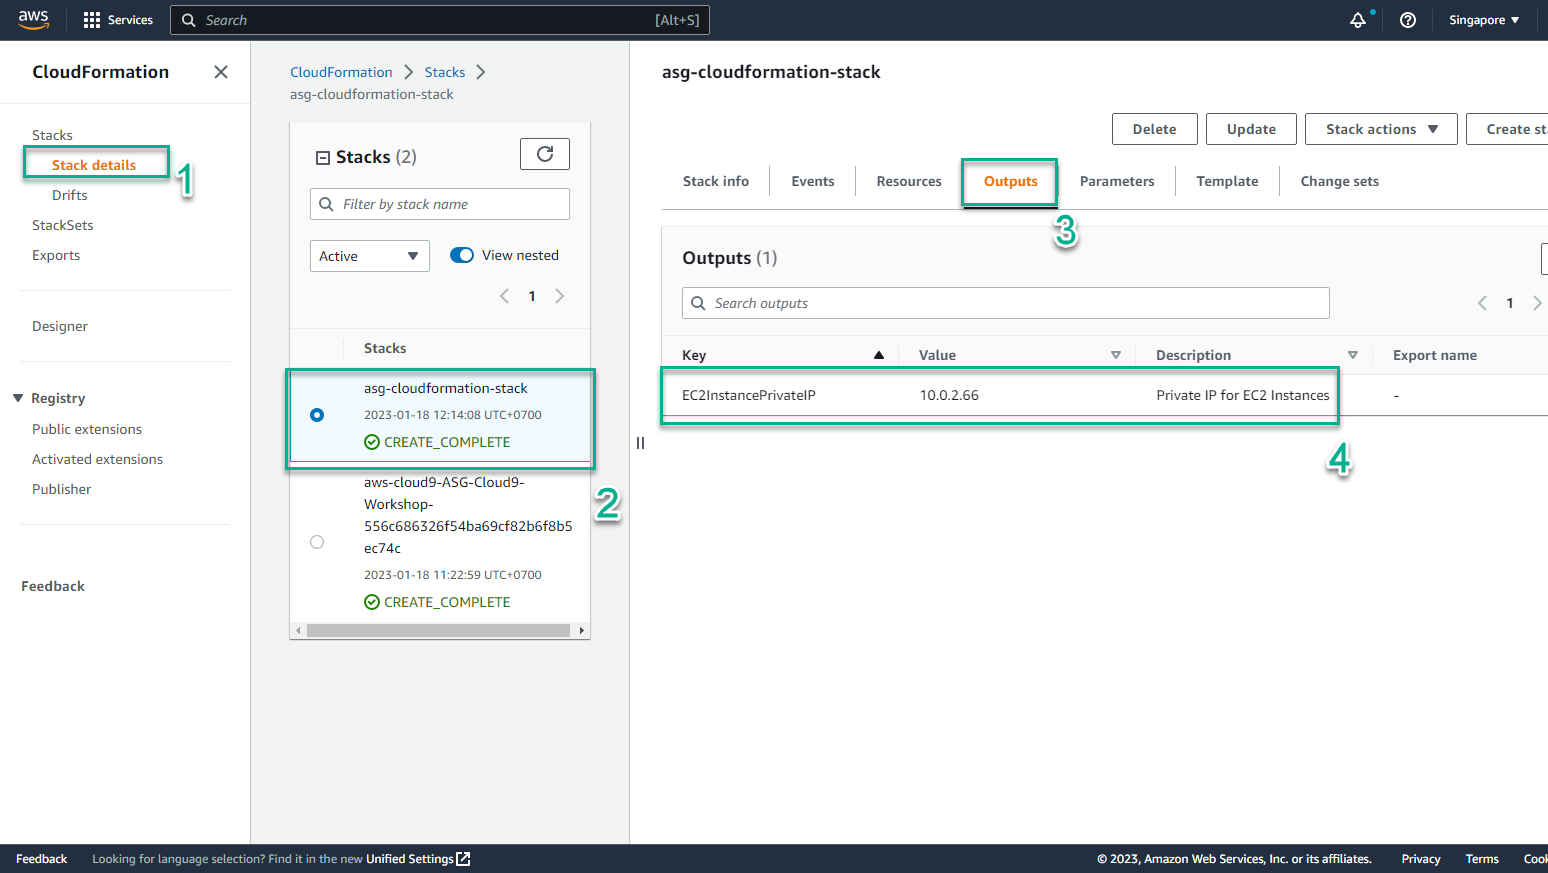
- Trong giao diện CloudFormation
- Chọn Stack details
- Chọn stack vừa tạo
- Chọn Outputs
- Kết quả nhận được 1 EC2Instance
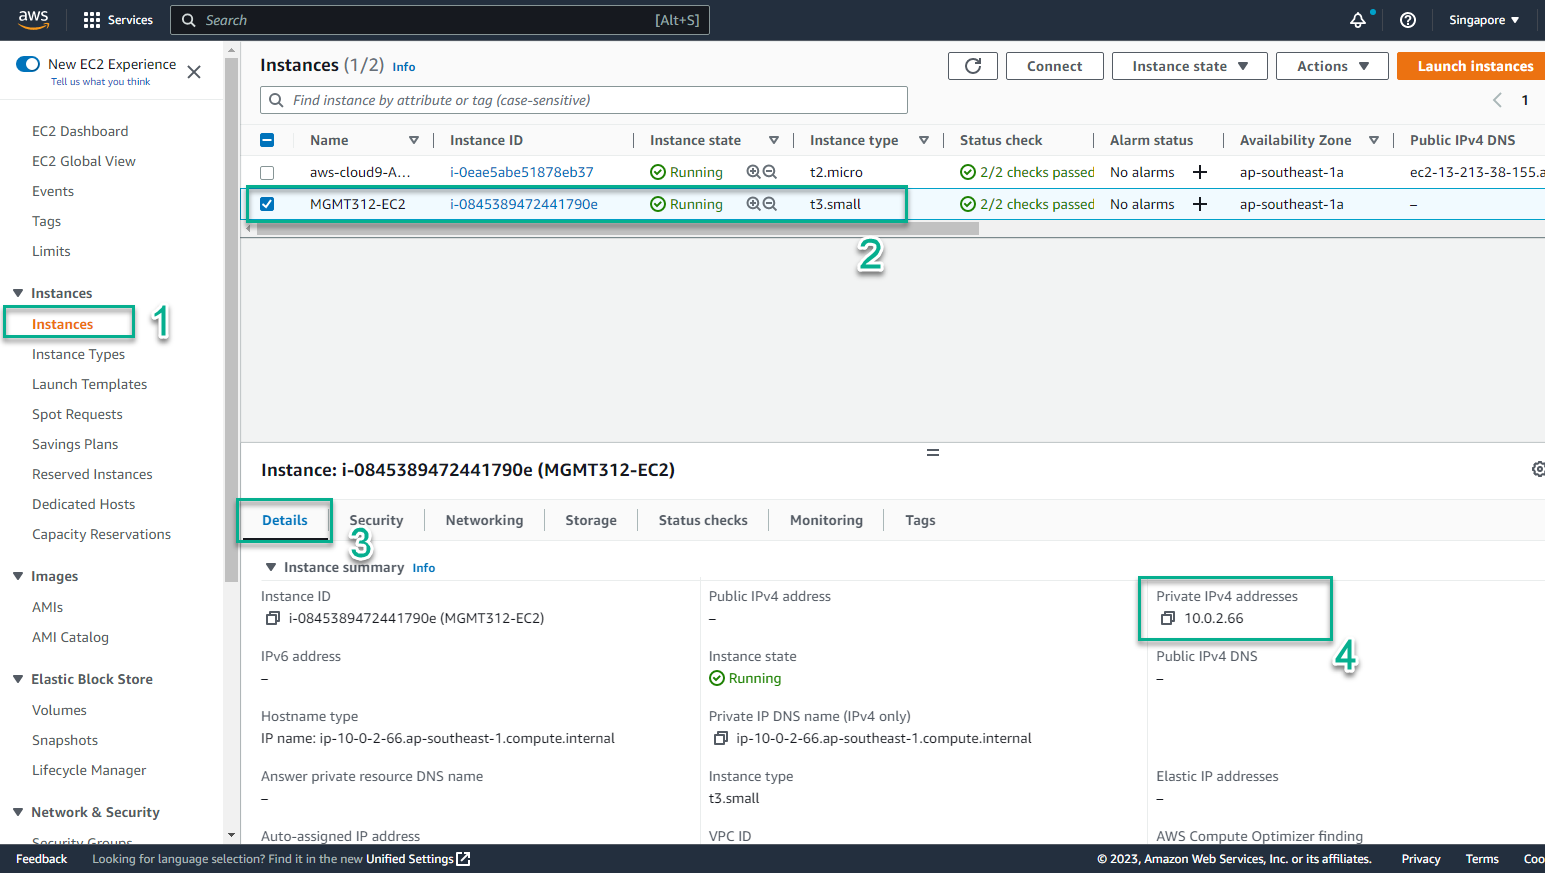
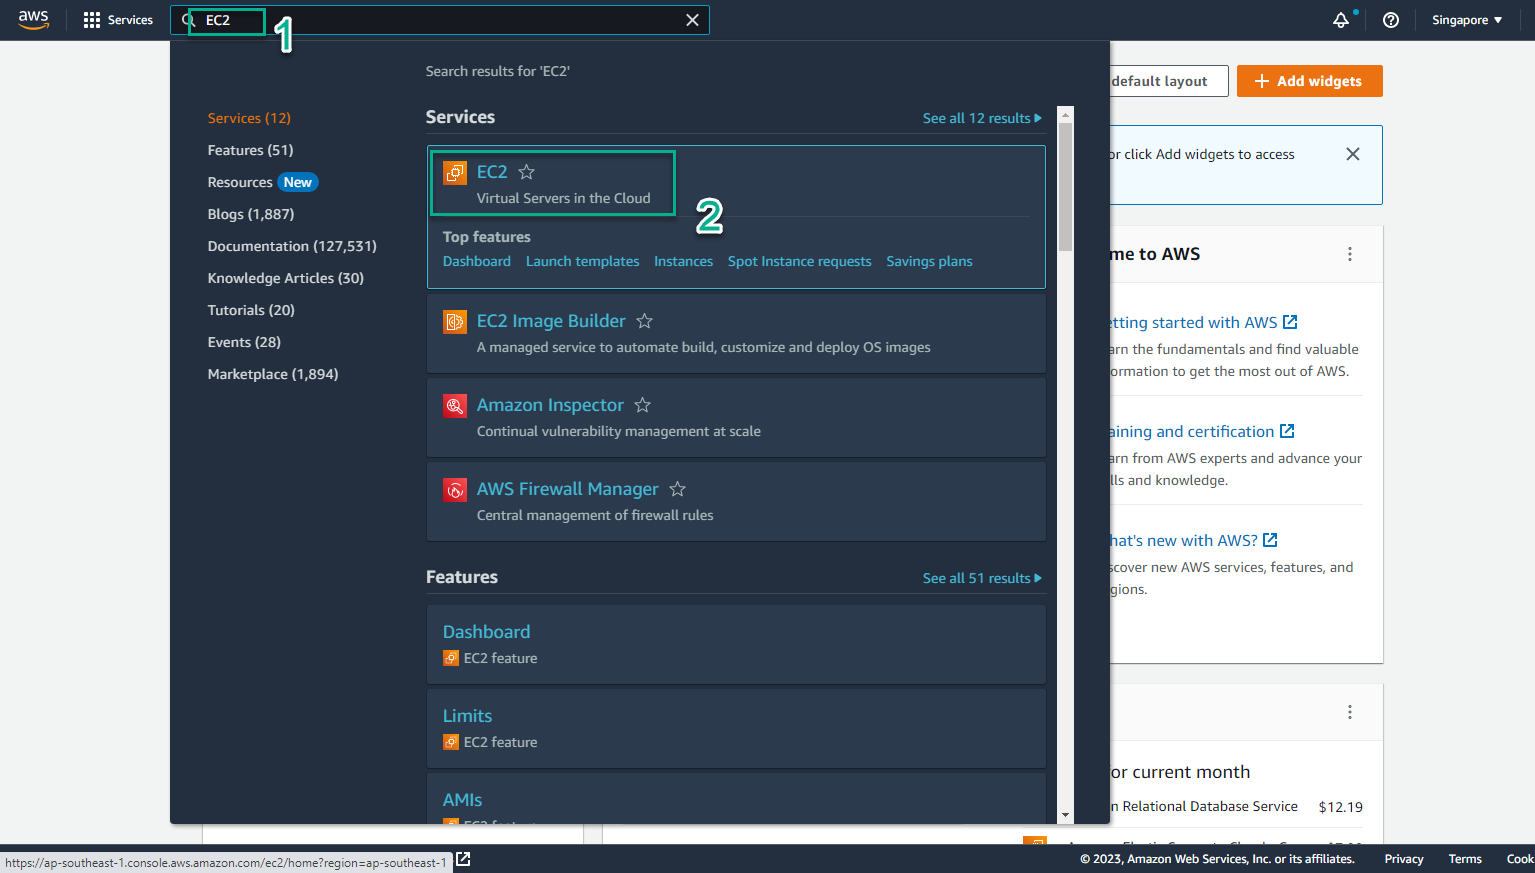
- Để kiểm chứng EC2 Instance được khởi tạo
- Truy nhập vào trang AWS Management Console
- Tìm EC2
- Chọn EC2
- Trong giao diện EC2
- Chọn Instances
- Chọn instance được khởi tạo
- Chọn Details để xem thông tin chi tiết